Introduction:
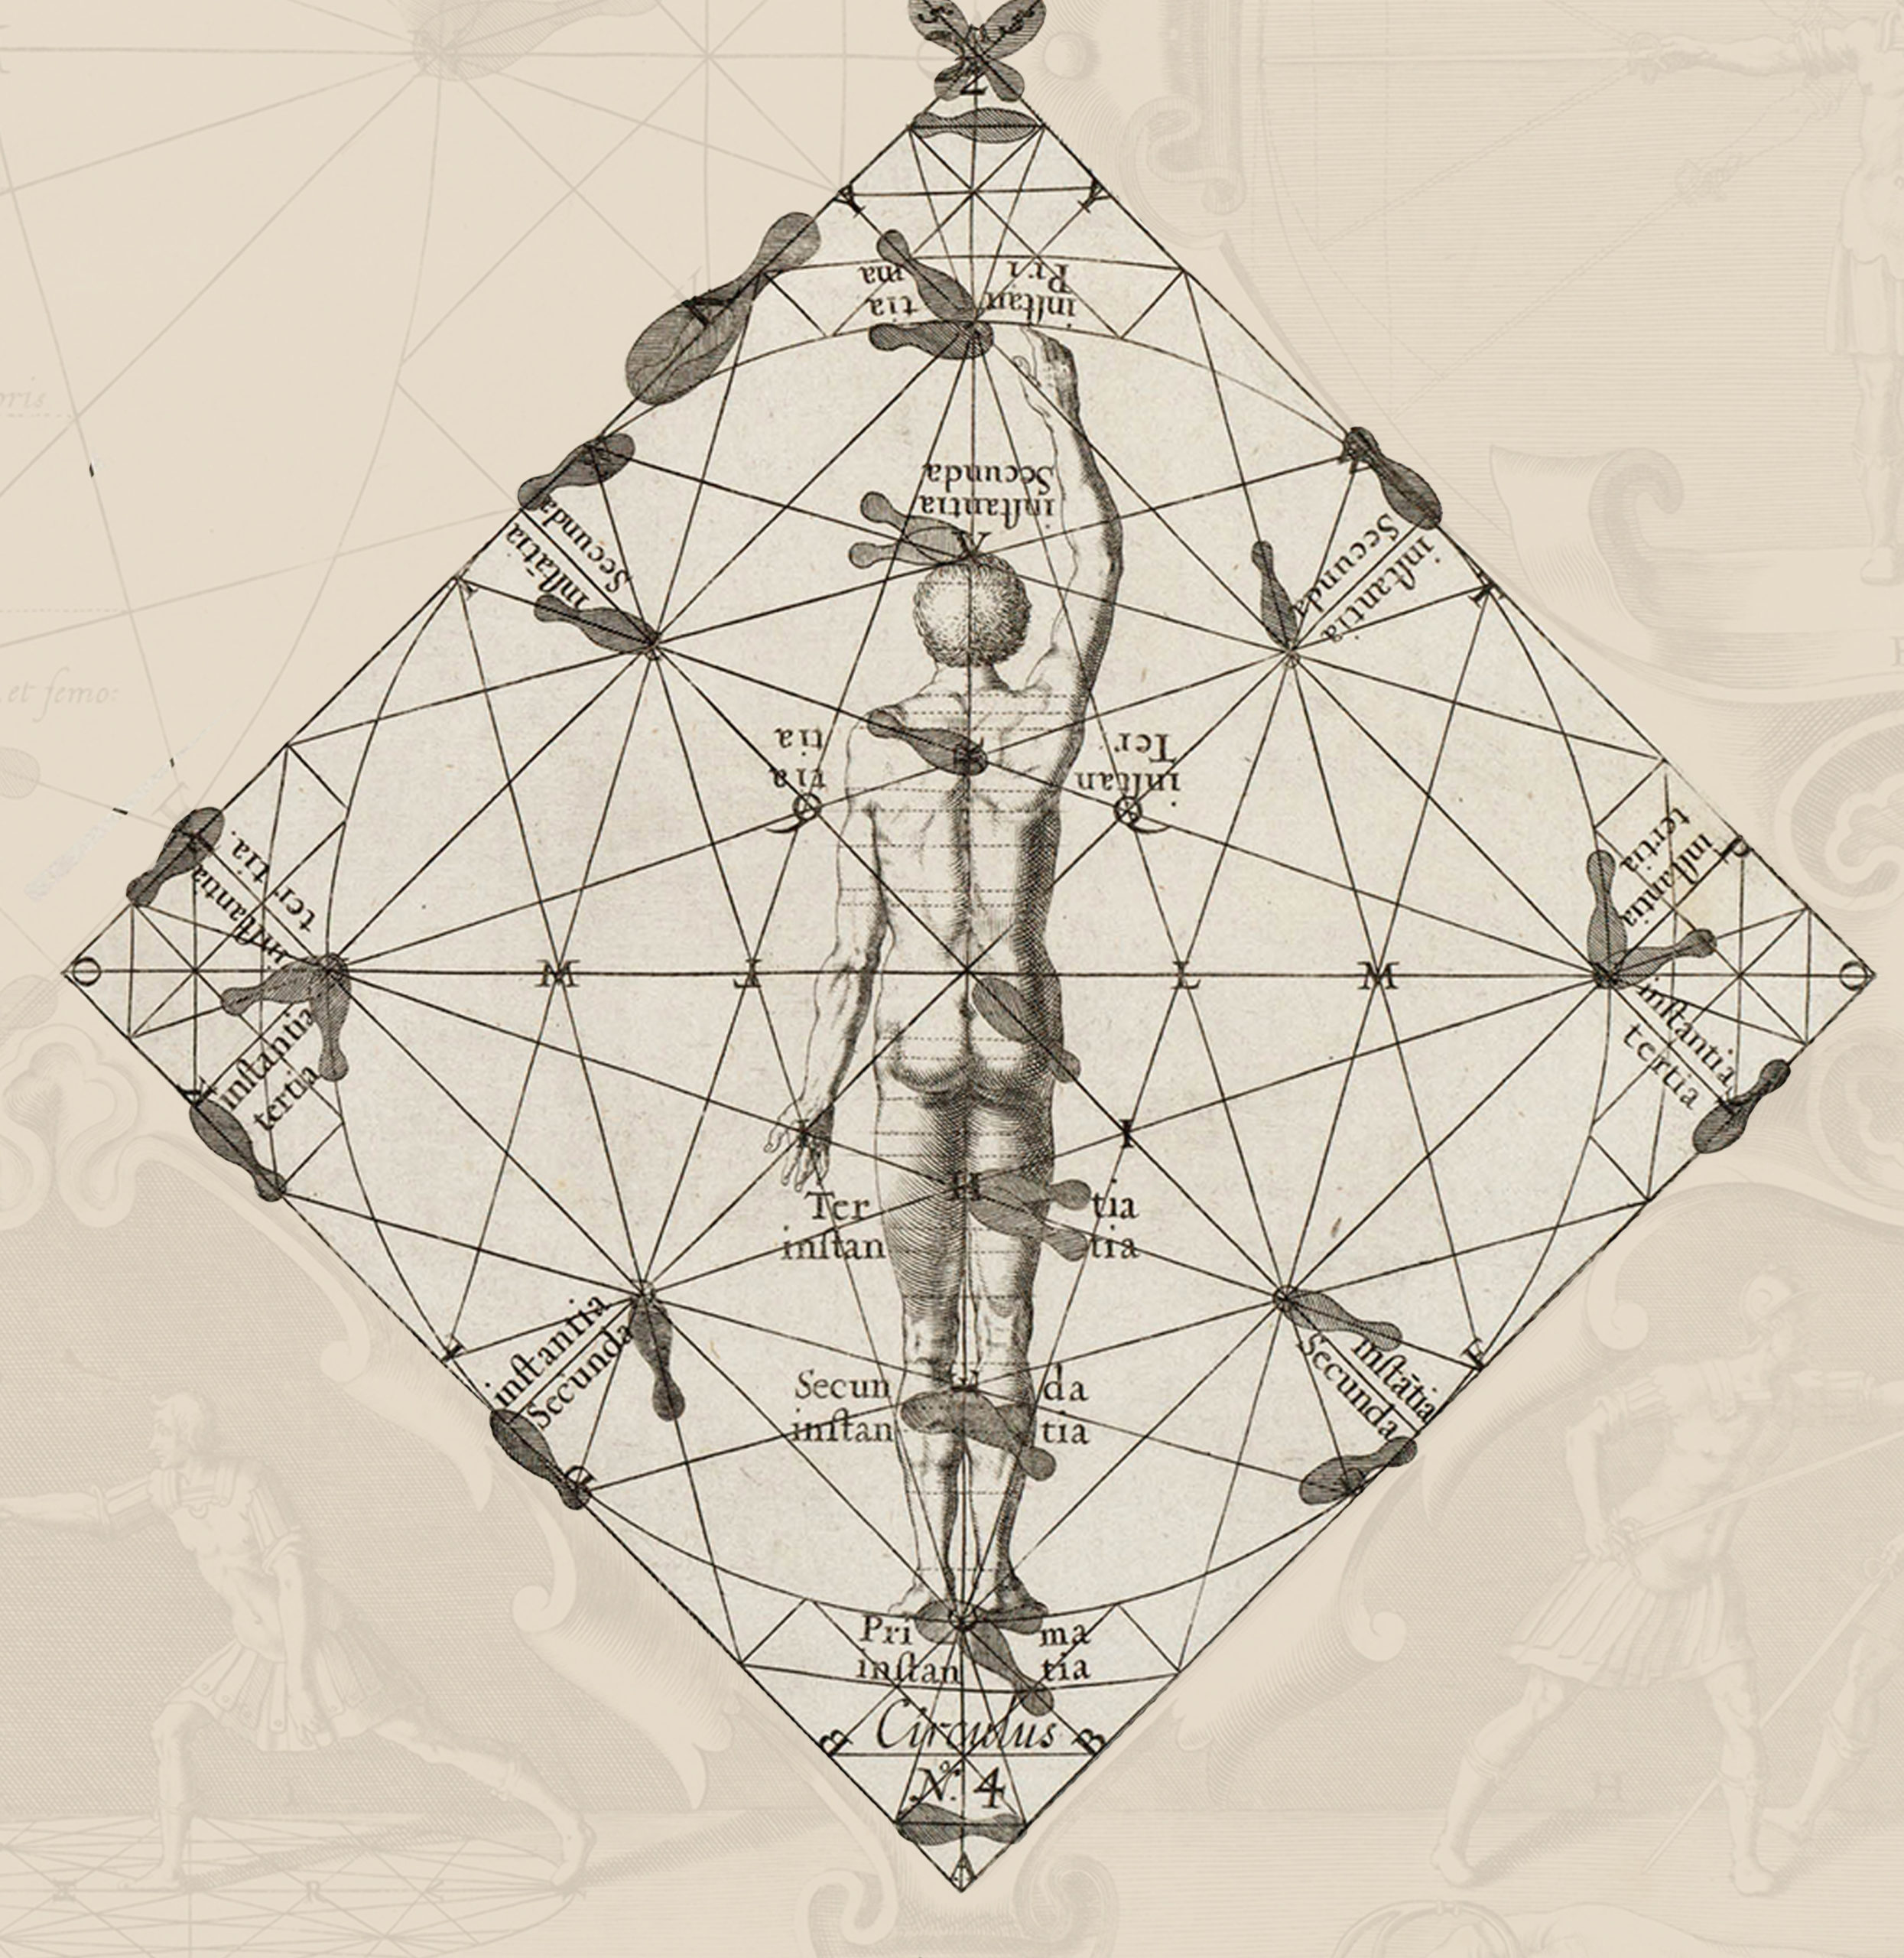
Many students who are studying Thibault’s work for the first time are surprised to find that he uses two different grips for his system. It can, in fact take some time to uncover that this is the case. Thibault himself, in Tabula I under the heading “The manner of holding the sword in the hand, for practicing our techniques,” shows and describes only one grip and admonishes the reader to “…hold the sword in this manner alone, and not in any other way; the more so as on this depends the certainty of a good part of all the operations, and on it are founded the most noble feats of thrusting, drawing and defending.” Notwithstanding this advice, in Tabula VI, Circle 6, Thibault explicitly describes, for the first time, a transition to a second grip. Given that, I interpret the above statement as indicating that, lacking any other direction we should assume that the grip in use is the primary grip that Thibault recommends in Tabula I.
Anatomy of the Hand:
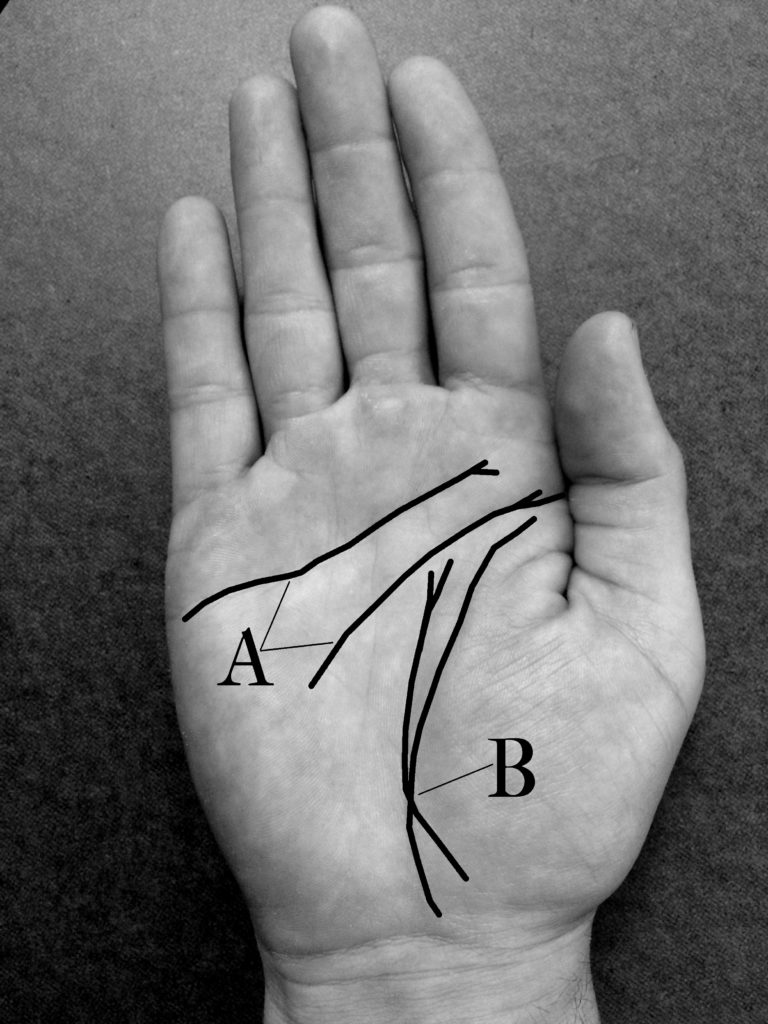
Anatomically, there is a lot going on in the hand, and the hand is, of course central to holding and manipulating the sword. We are primarily concerned, however with the Thumb, Index Finger, Ring Finger, and the Thenar and Palmer Creases. Assuming that you are already familiar with the Thumb, Index Finger and Ring Finger, let’s move on to the creases.
Most people have two Palmer Creases. These are the lines labeled ‘A’ in figure I. The crease closest to the fingers is the Distal Palmer, the one closest to the wrist is the Proximal Palmer. For the sake of this write-up, we will refer to them collectively as the Palmer Creases.
The Thenar Crease (Fig. I: B) runs along the curve of the Thenar, which is the soft, padded portion of the palm at the base of the thumb.
The Grips:
It bears mentioning that Thibault was horrible at naming things. Most of the time he didn’t even try; relying, rather on descriptions. For the sake of more efficient communication, I have assigned terms in some places where Thibault hasn’t. I refer to the grips as the Primary Grip (or the Straight Arm Grip), the Cutting Grip (or the Curved Arm Grip), and the Intermediate Grip.
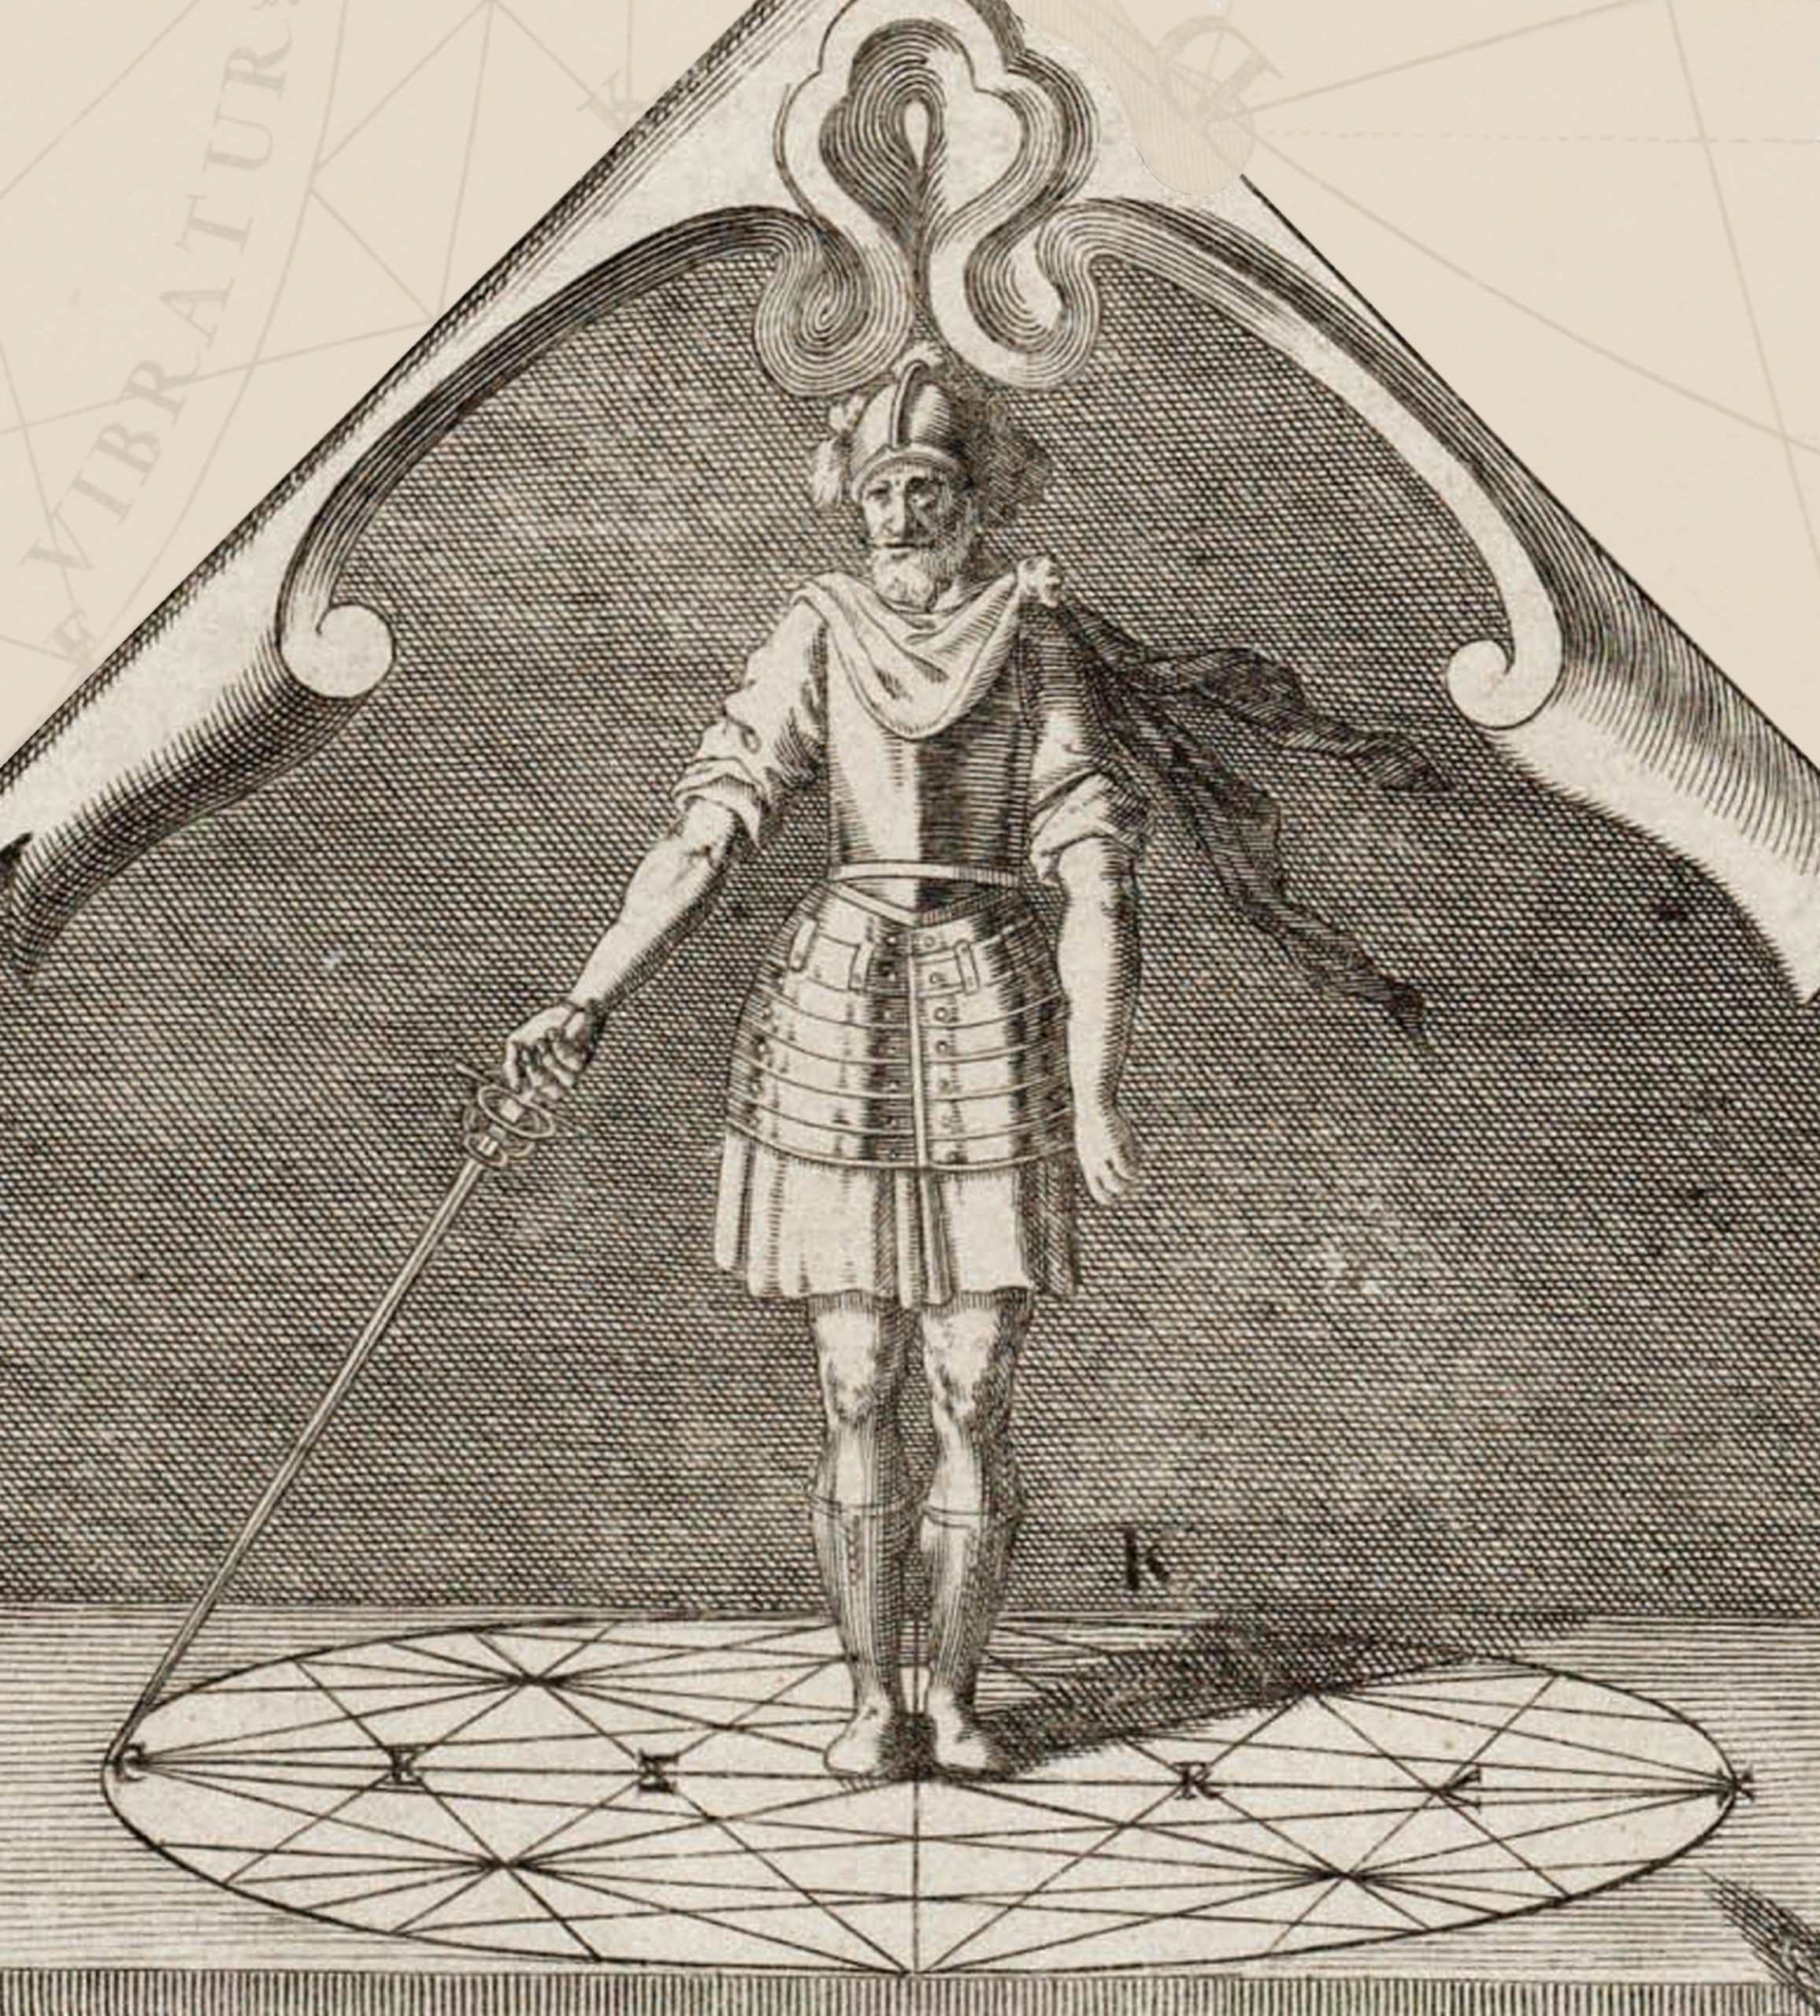
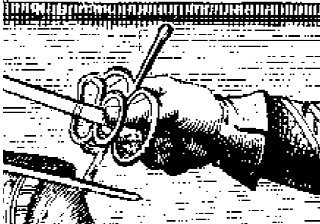
As mentioned above, Thibault’s Primary Grip is described in Tabula I, Circle 6. John Michael Greer’s translation reads as follows:
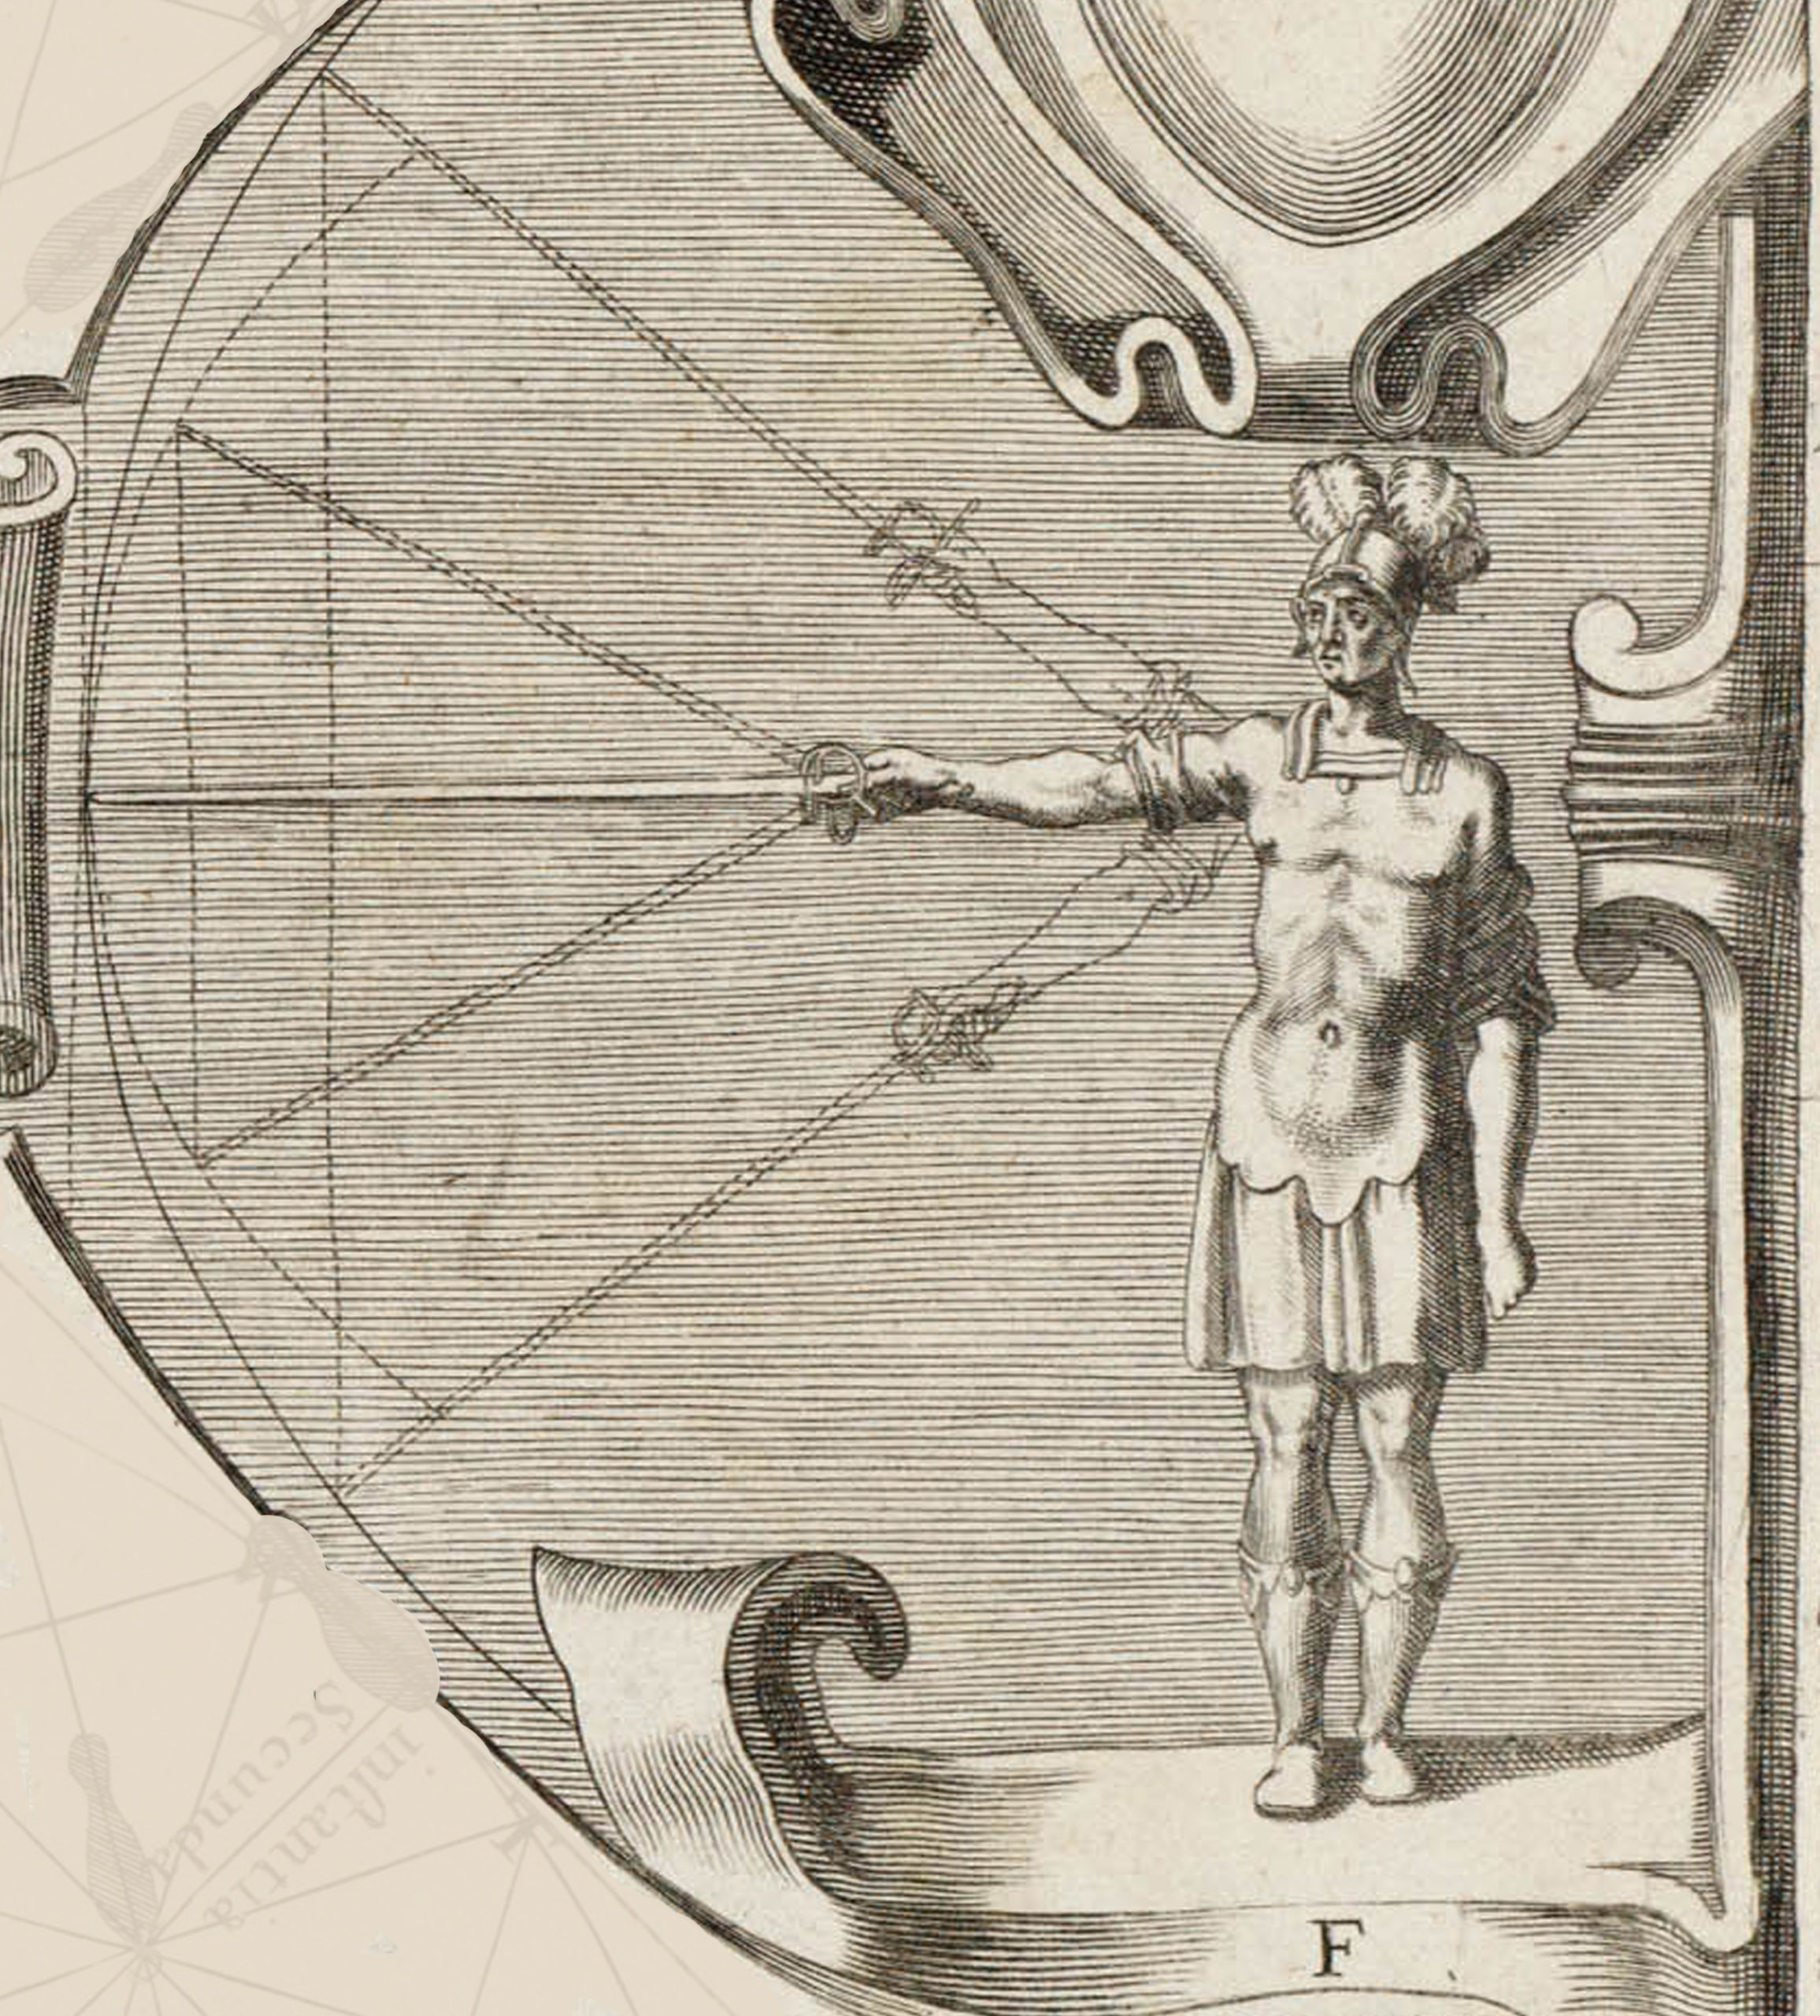
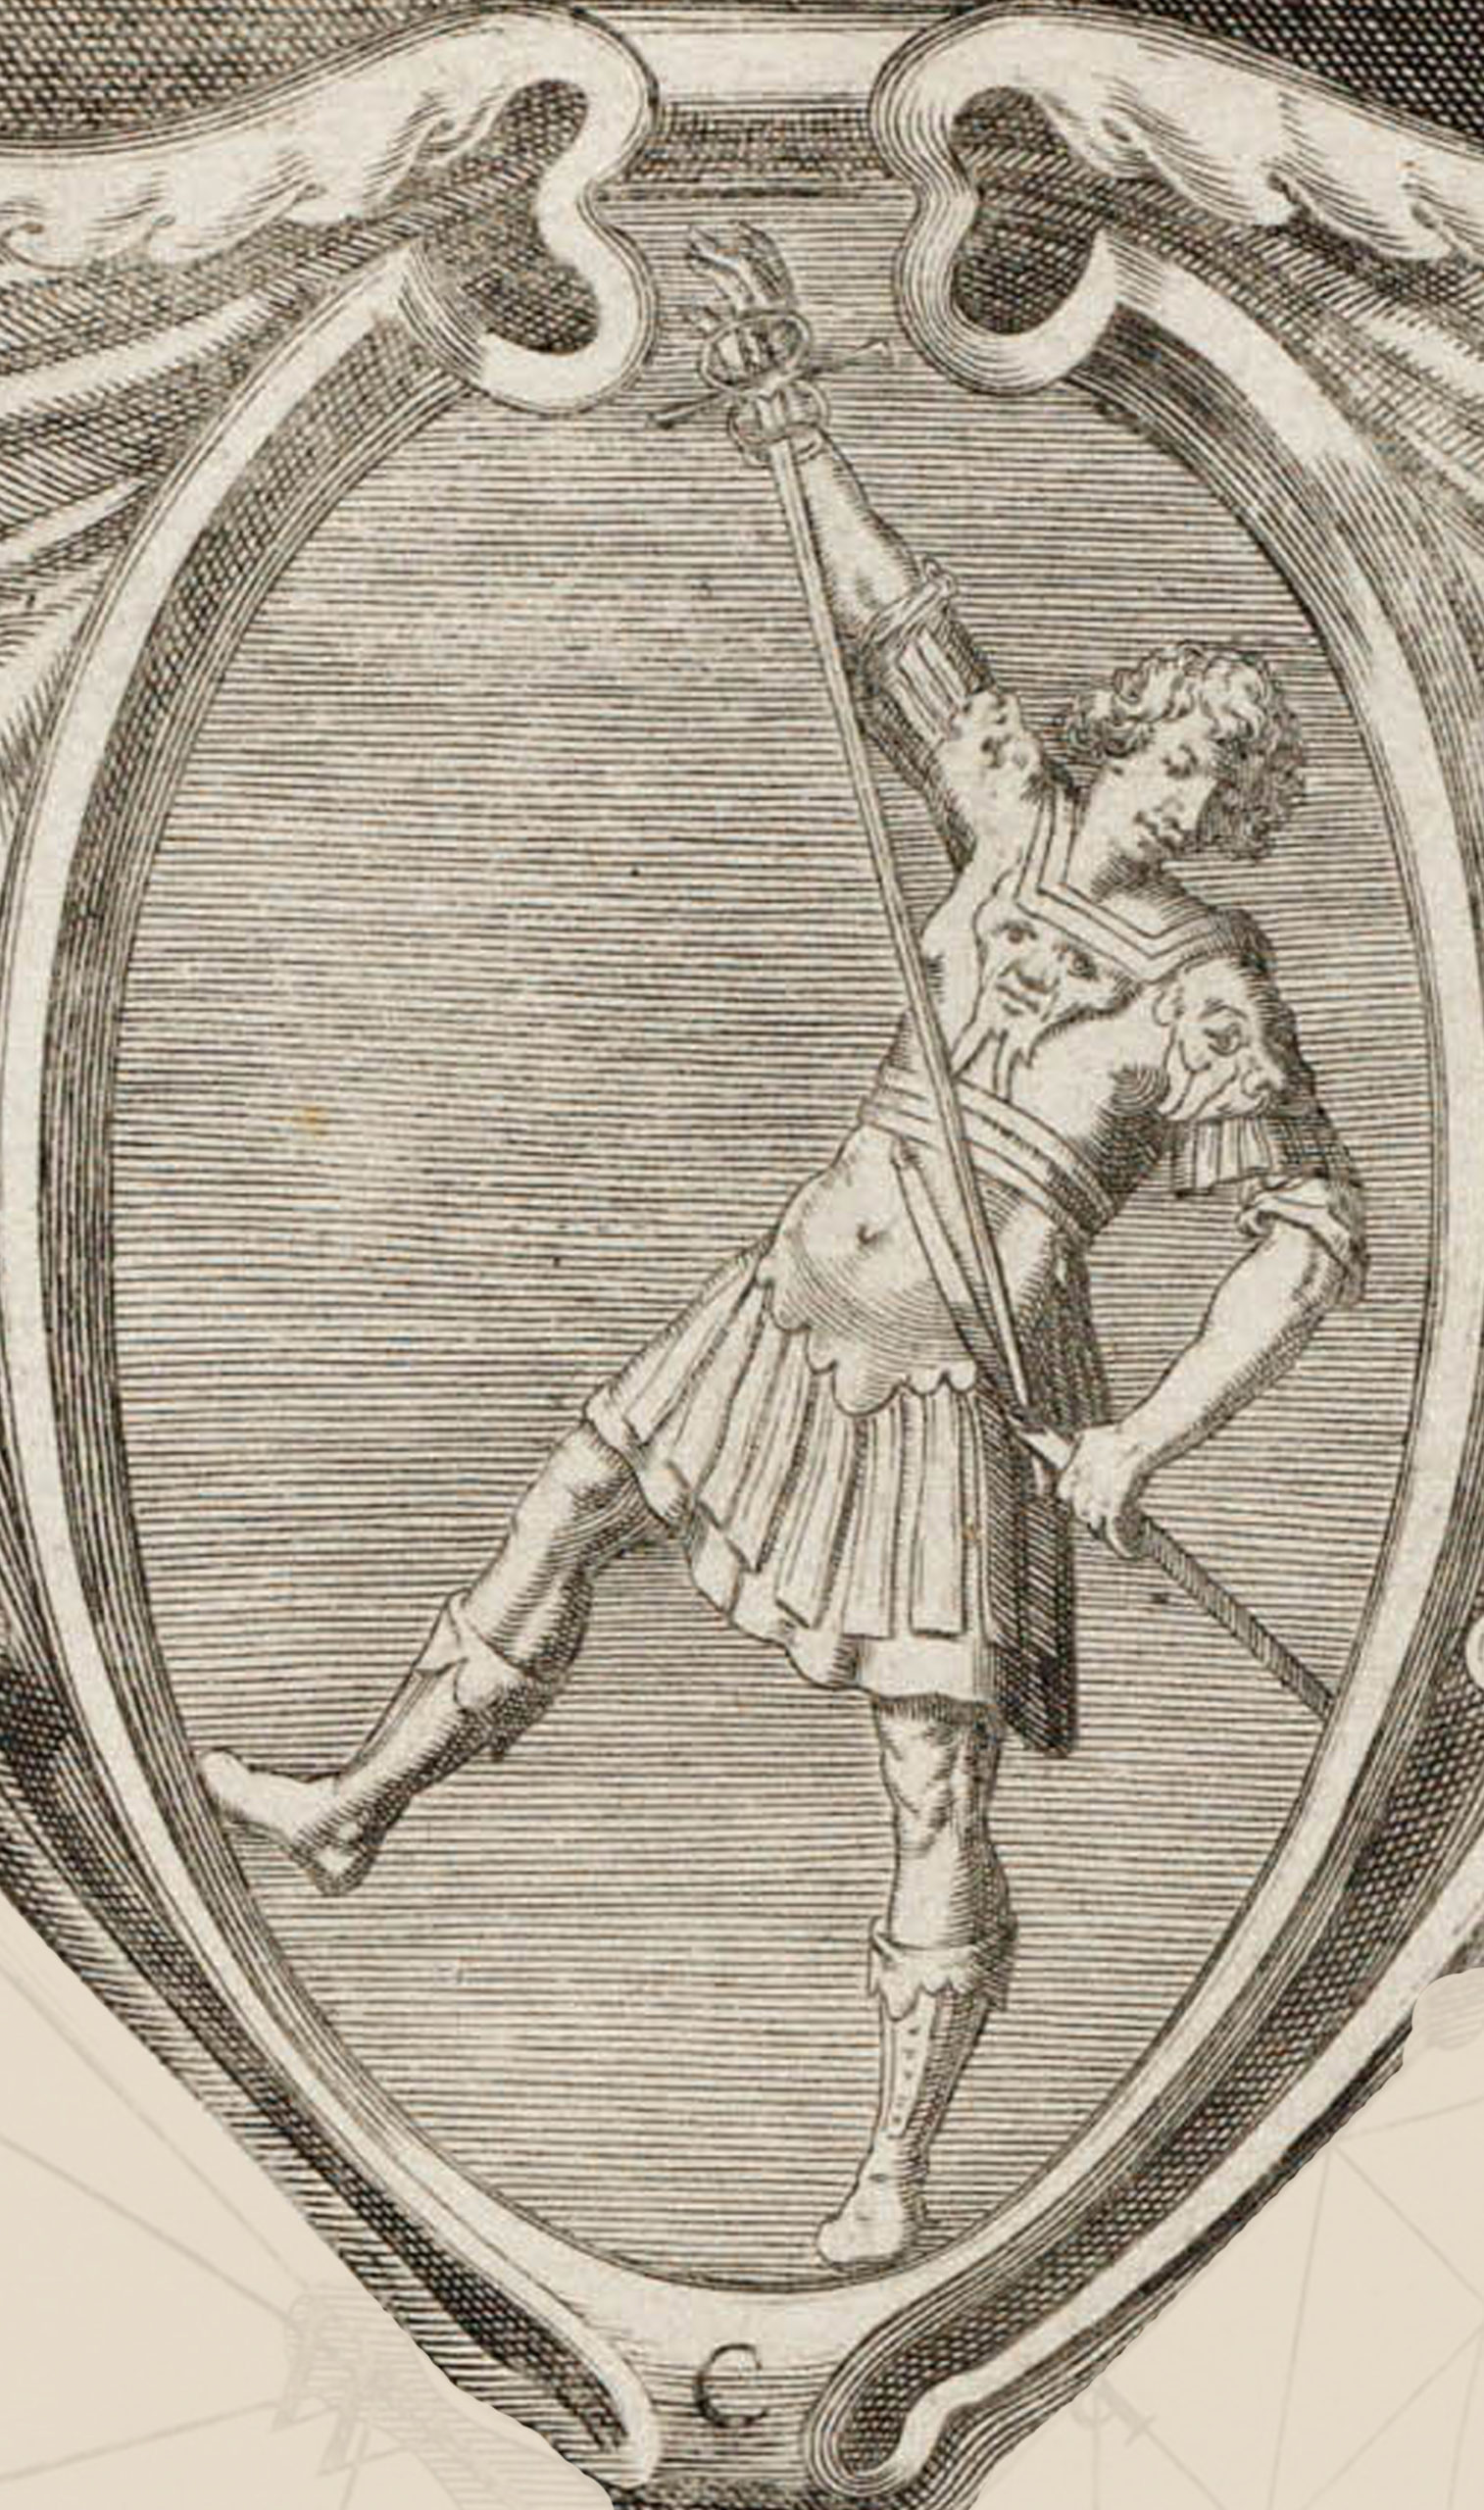
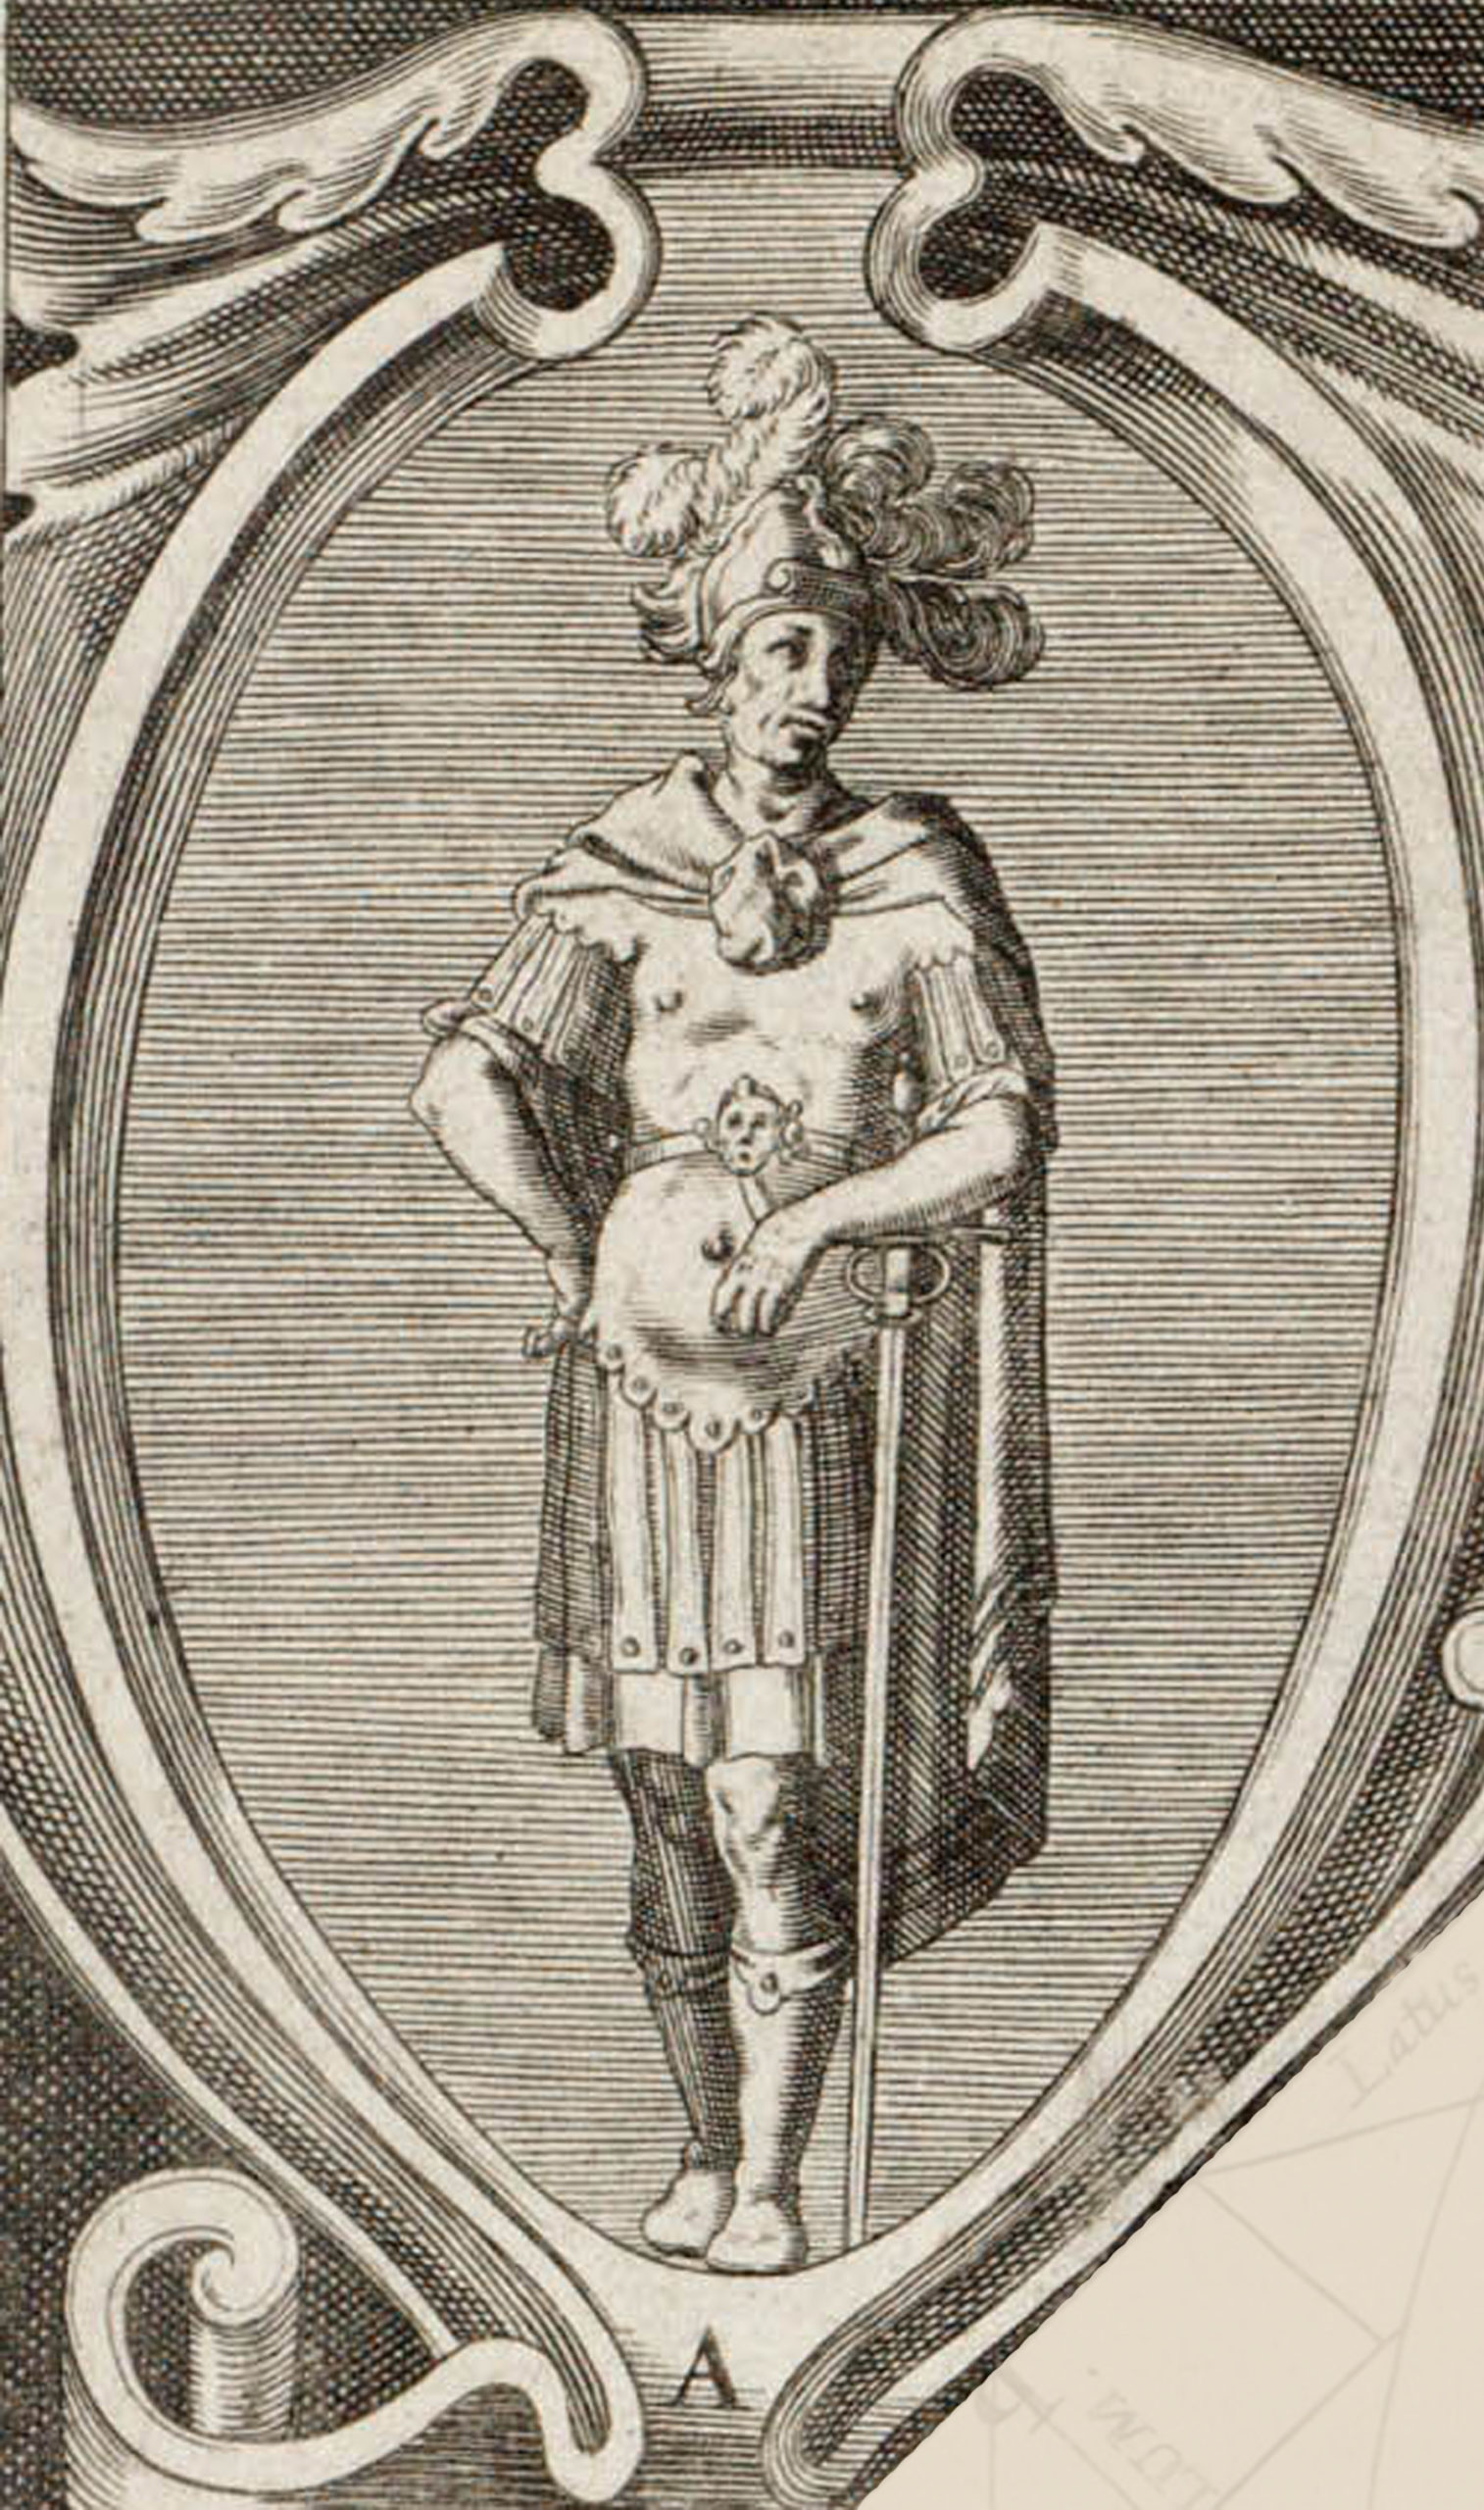
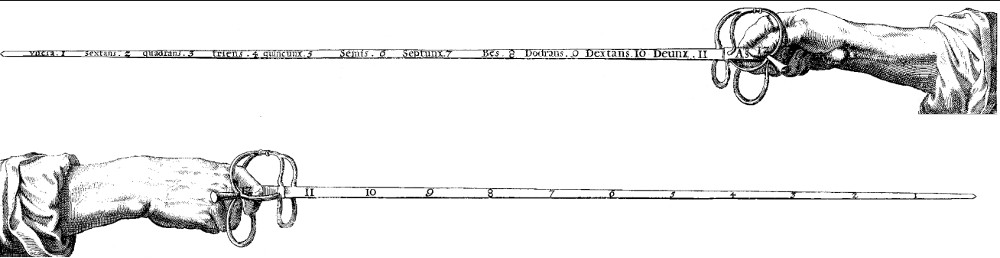
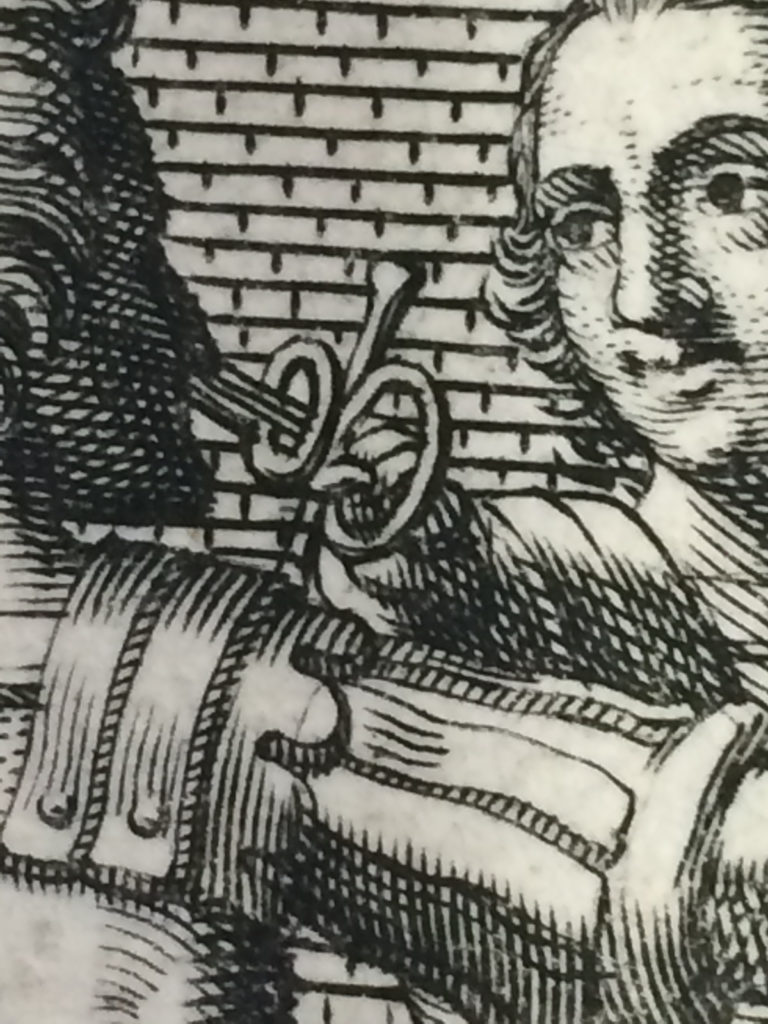
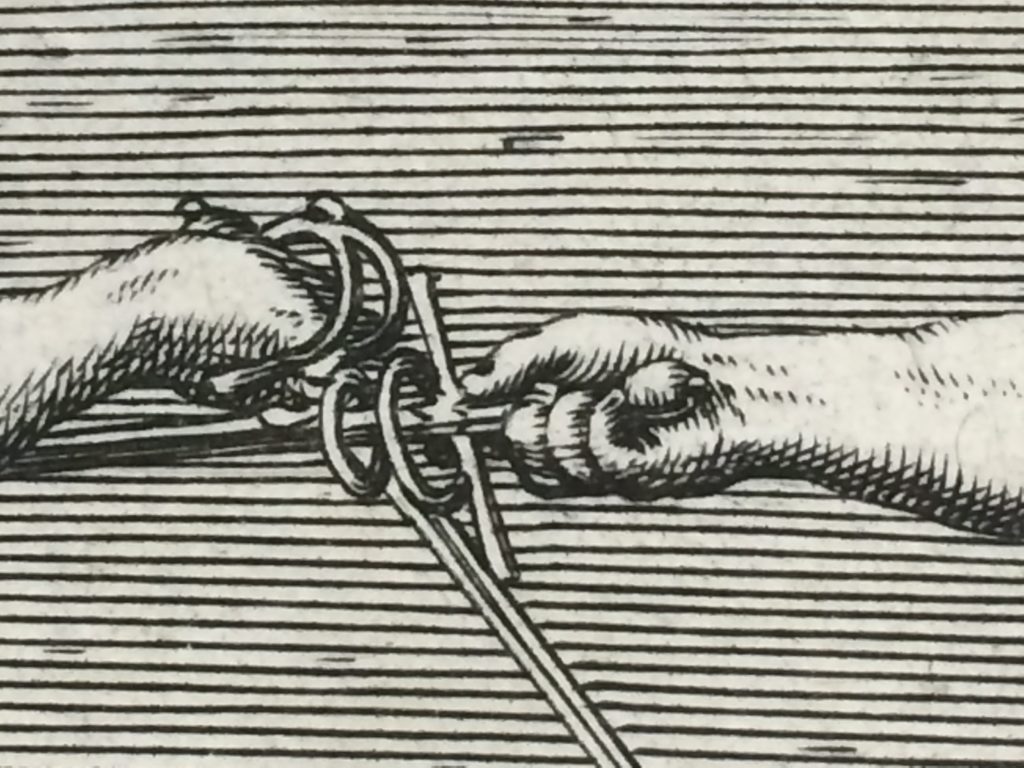
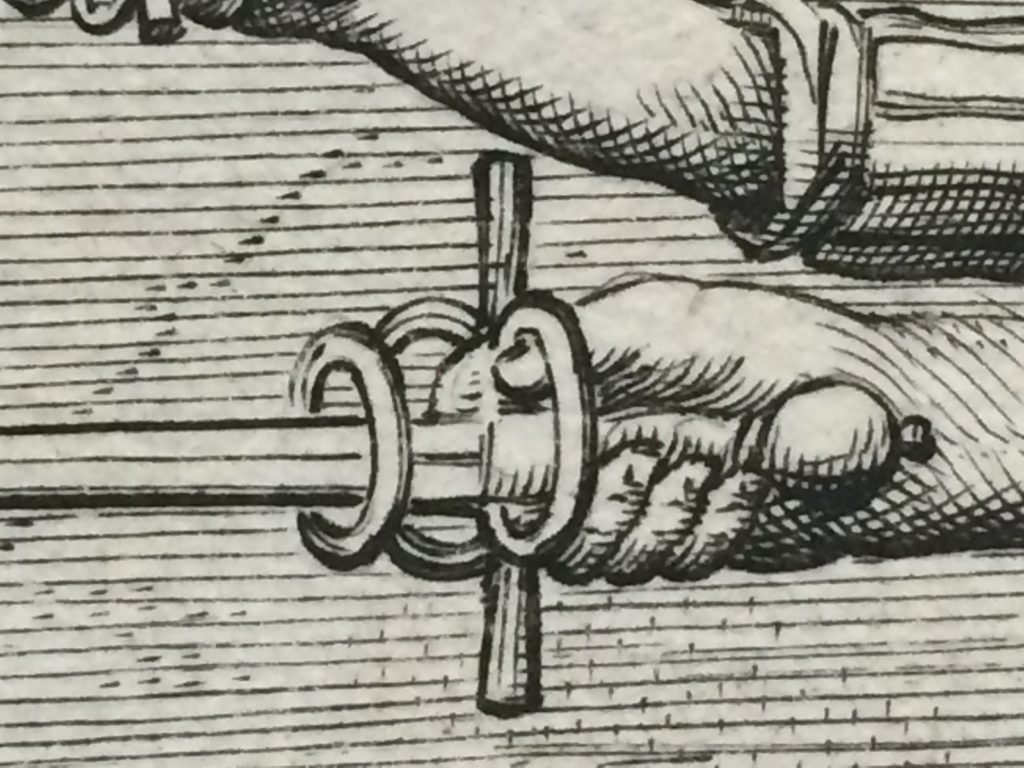
For as shown here in these two numbered swords (Fig 2), we put the index finger in the hilt over the outside arm of the hilt, and around the heel of the blade; the thumb goes on the other side, on the inside arm of the hilt or up against it, inside the hilt similarly; the rest of the fingers close tightly around the grip, so that the pommel is held firm inside the hollow of the wrist, and the quillons are horizontal and on the same level.
From a practical perspective, a few things should be noted about the description and the illustrations:
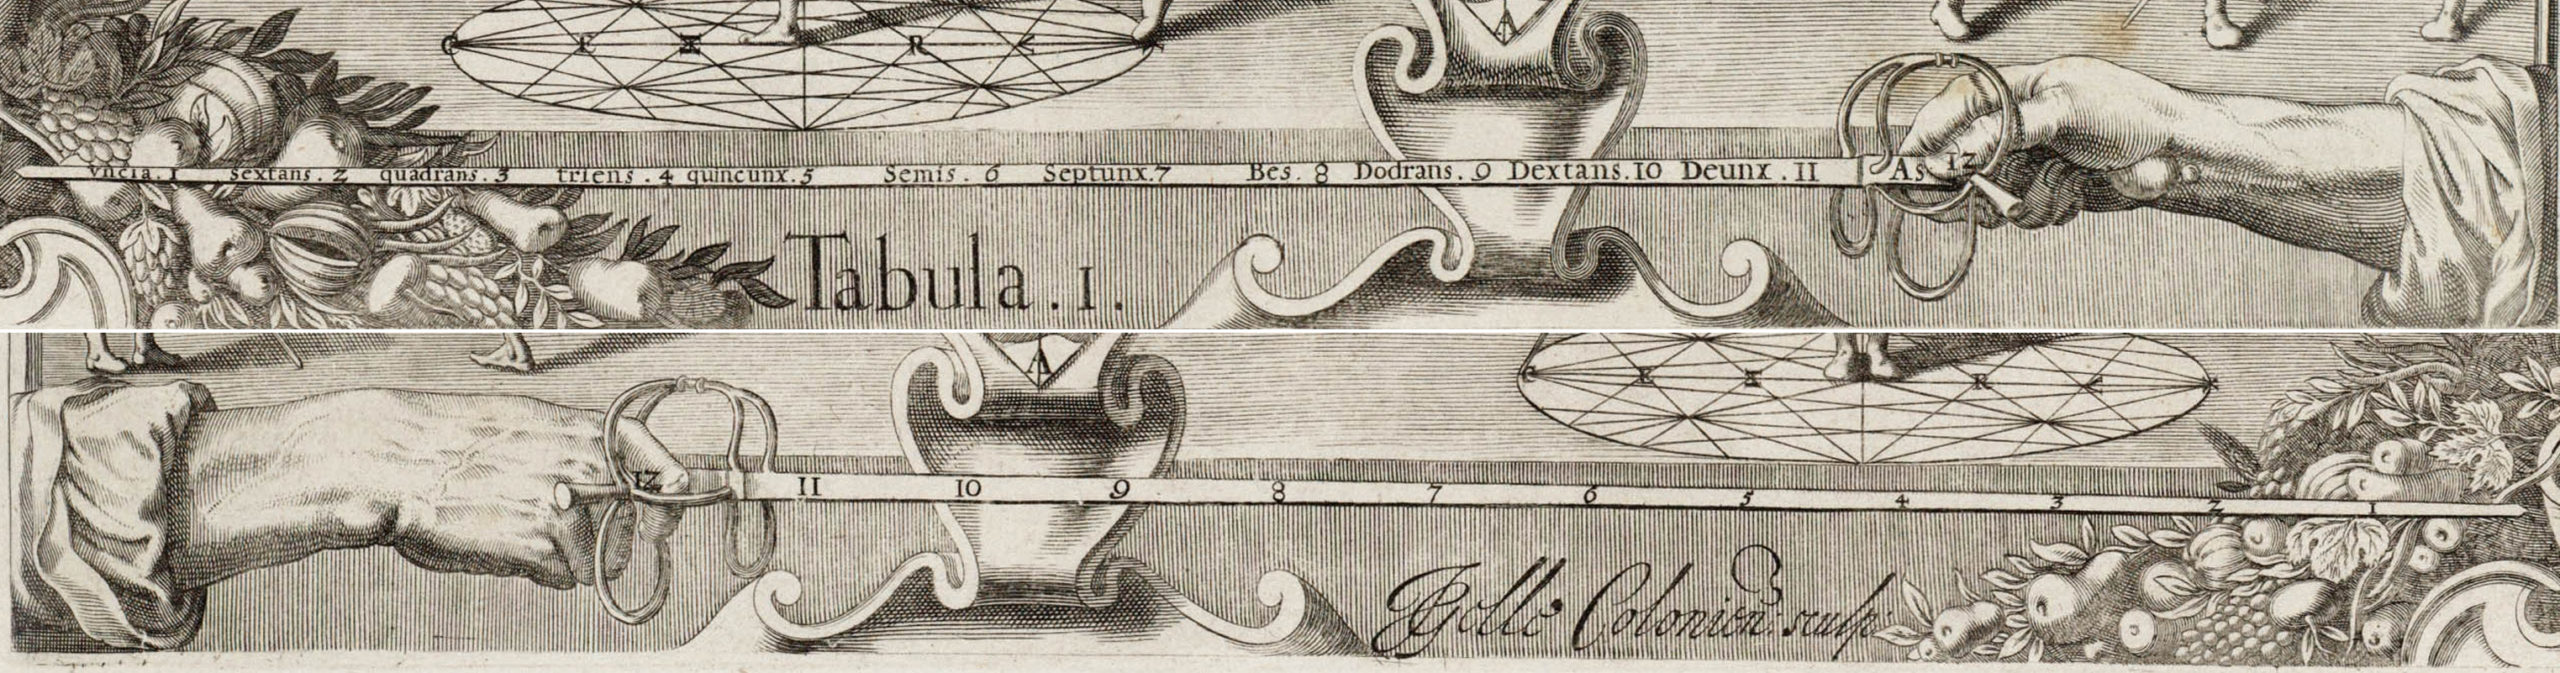
- The blades should actually be viewed edge on. In the illustration, the blades are somewhat rotated in order to give a surface on which numbers could be inscribed. These numbers will be discussed in greater detail later on when I address mechanical advantage.
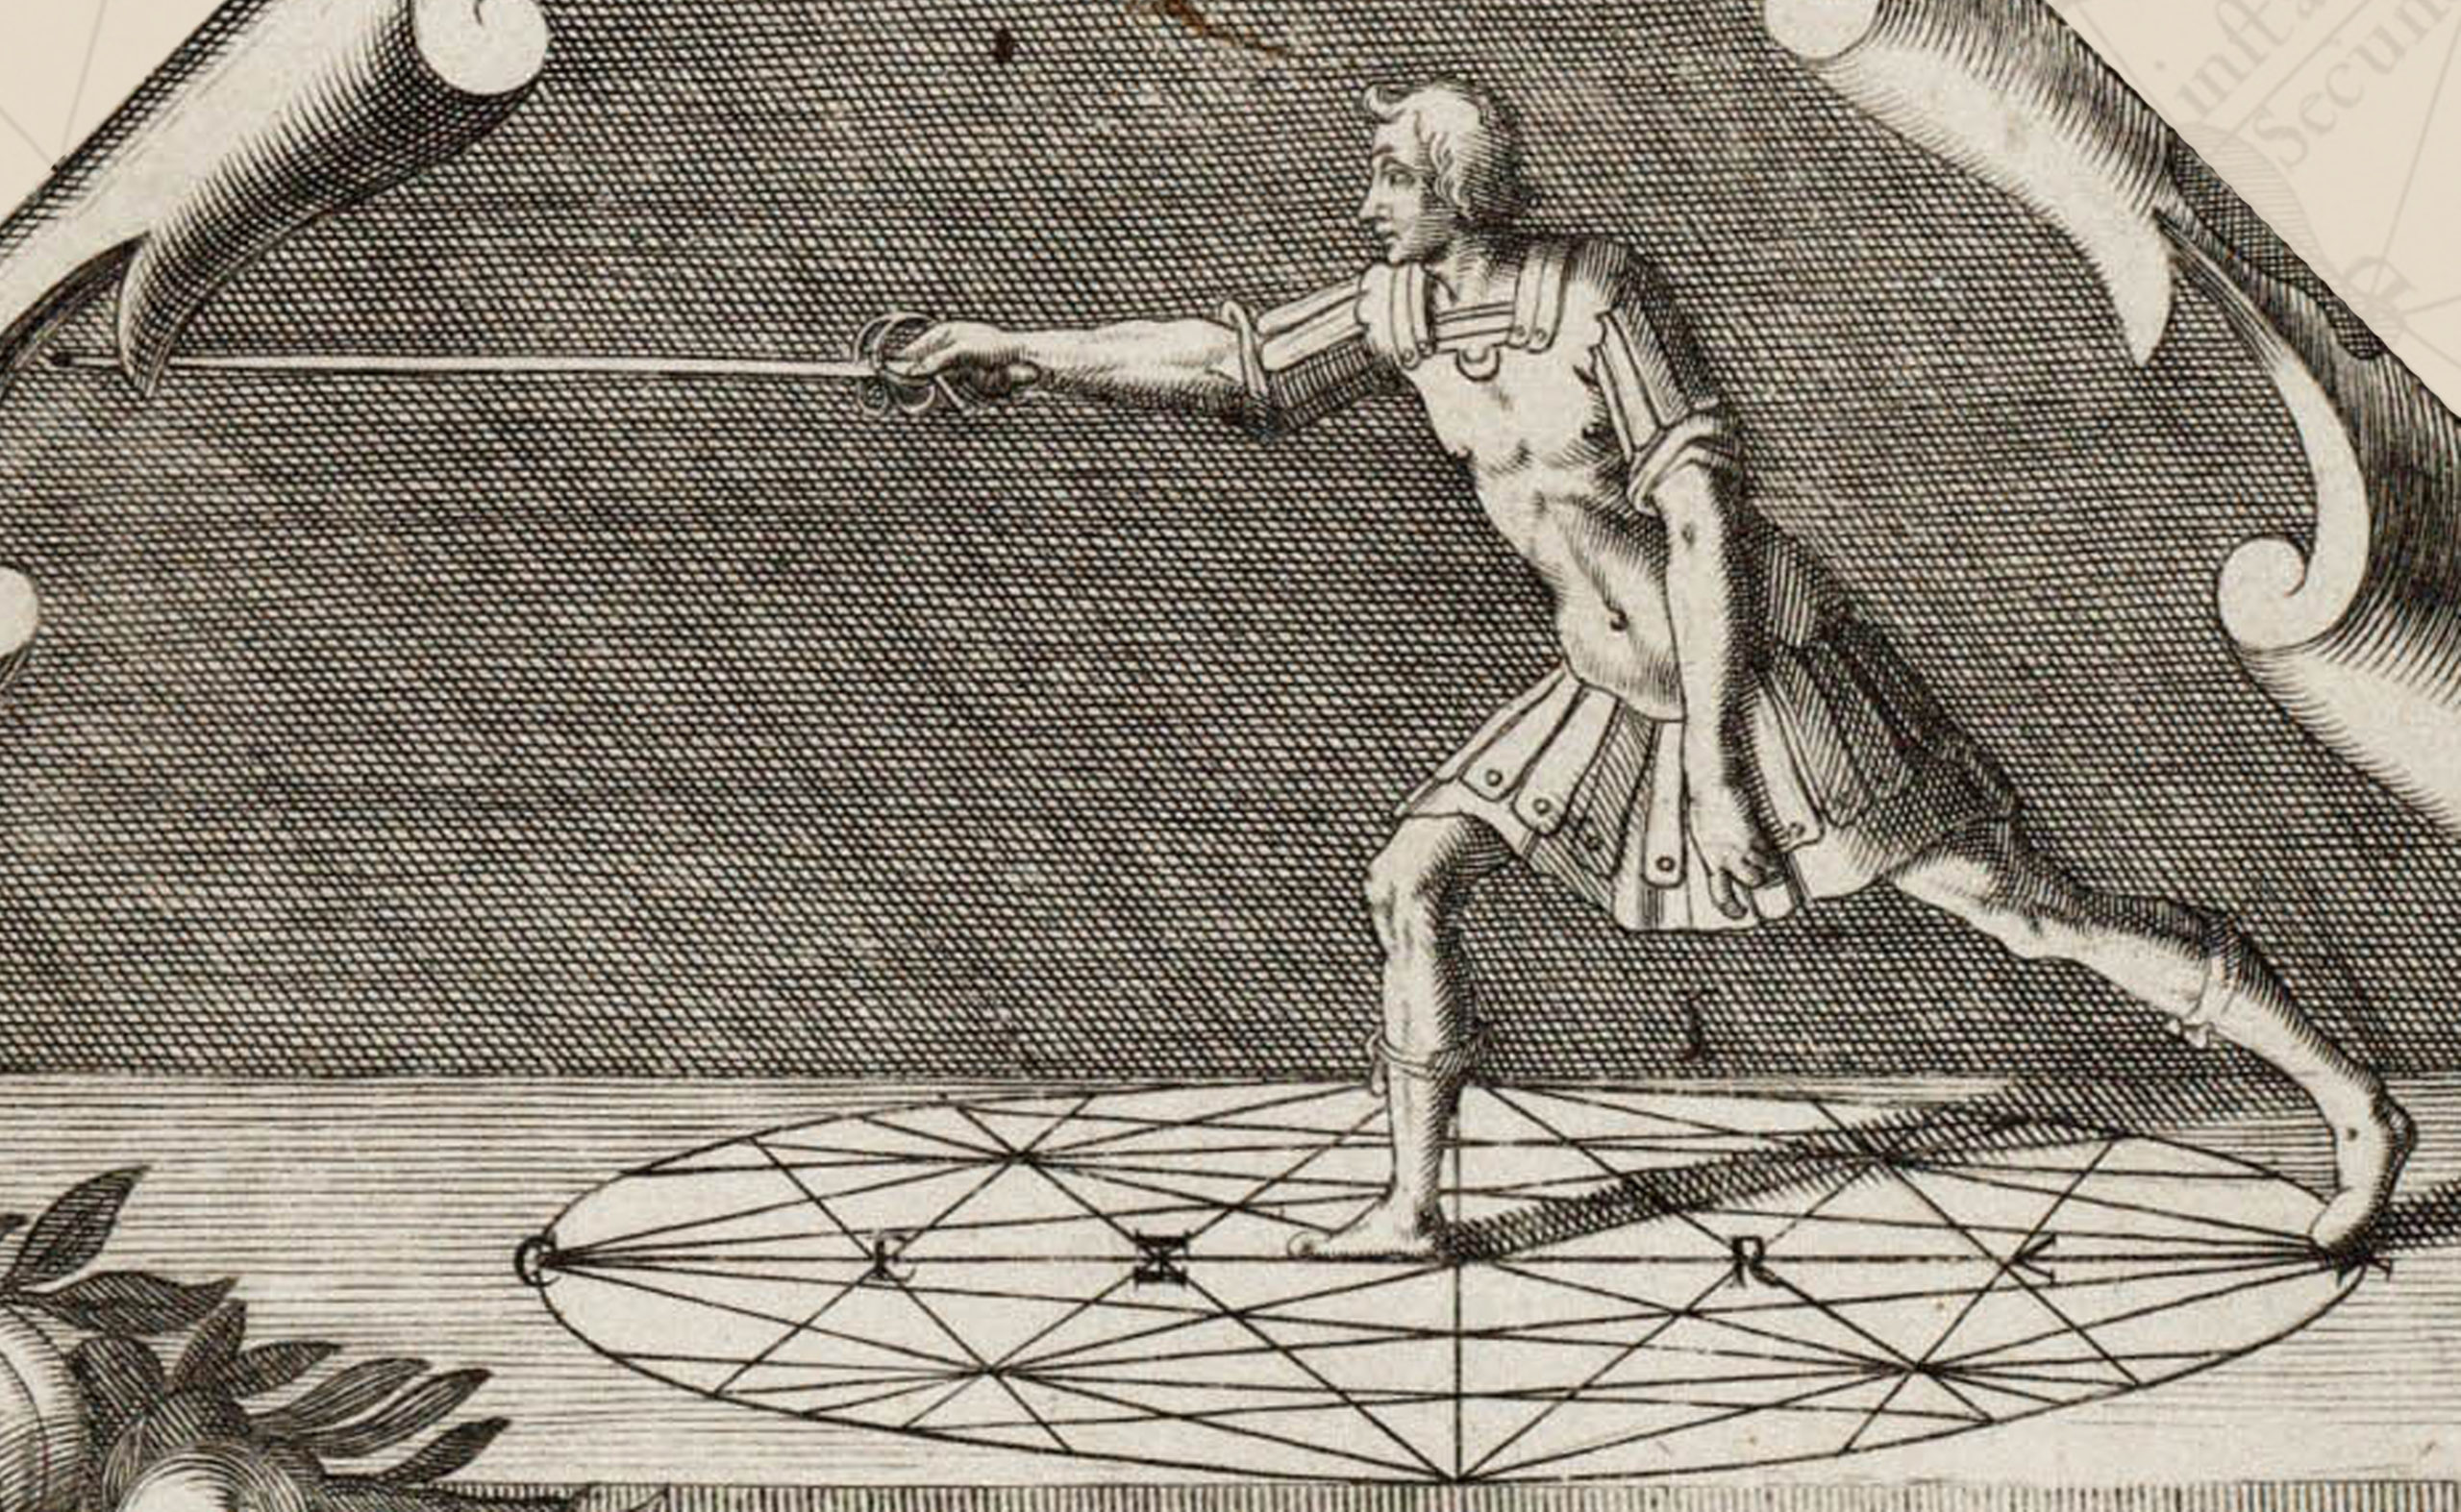
- On the lower illustration, the curve of the index finger would require a degree of flexibility that the anatomy of a typical index finger does not possess in its healthy state. While the index finger does curl under the blade, in my experience, it tends to point more toward the point of the sword than what is shown in Thibault’s illustration.
- On the upper illustration, the thumb is shown all the way up on the blade rather than “on the inside arm of the hilt or up against it” as Thibault describes.
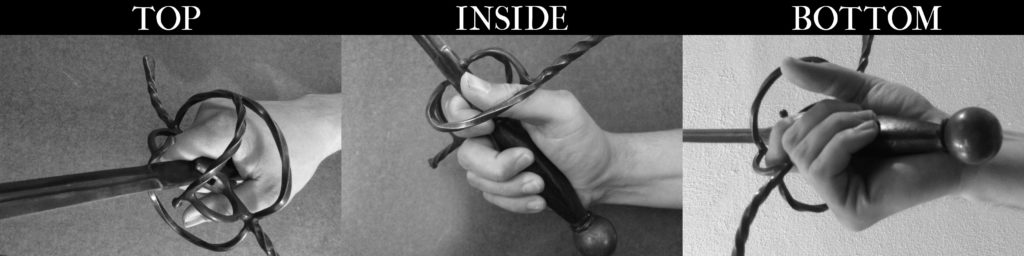
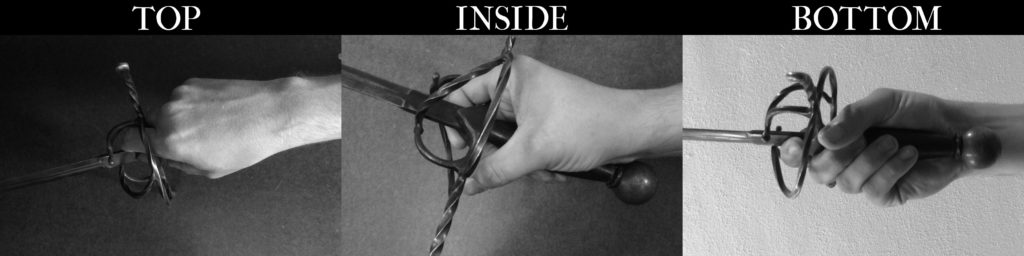
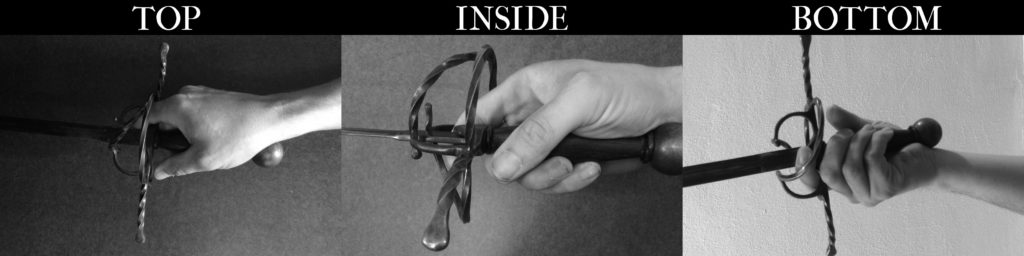
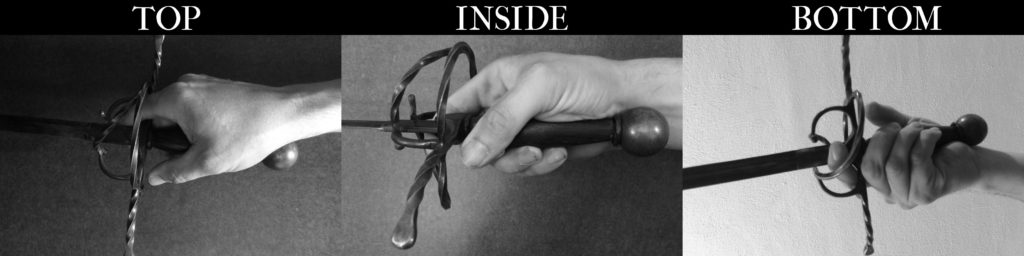
The Primary Grip may be assumed as follows:
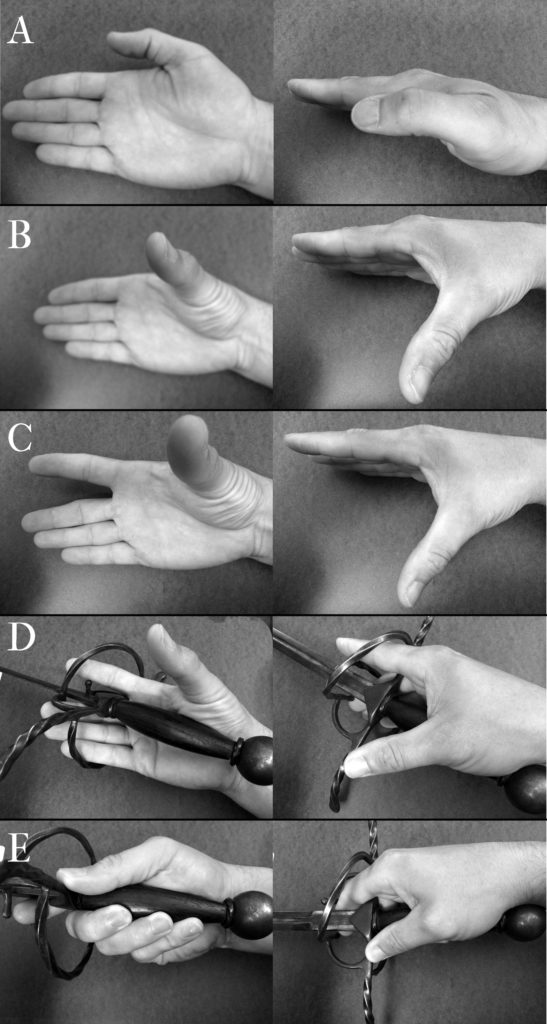
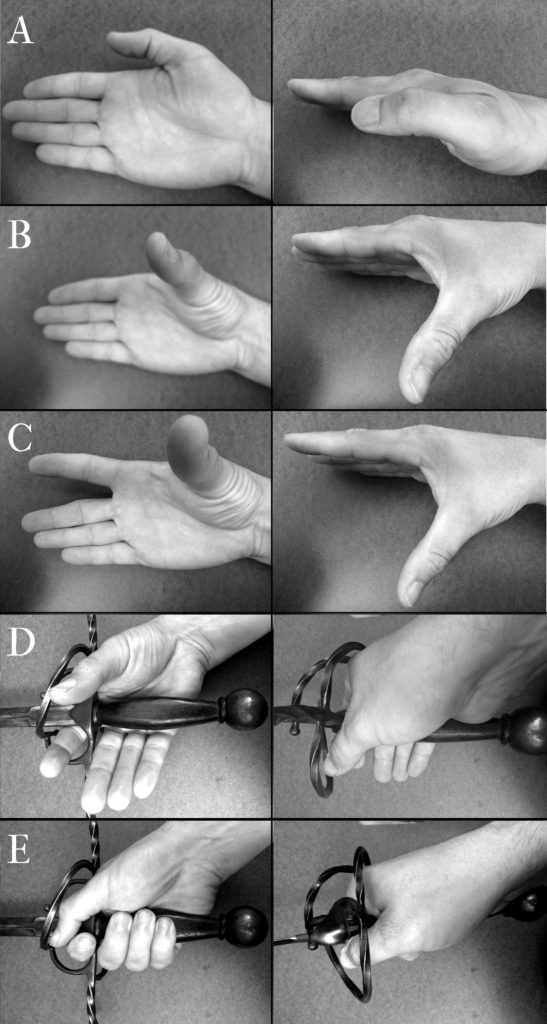
- Hold the sword hand in a vertical alignment. With the Thumb side of the hand directed upward and the Little Finger side directed downward (Fig 3a).
- Extend the thumb horizontally away from the palm (Fig 3b).
- Holding the Middle, Ring, and Little fingers together, raise the Index Finger vertically, creating a gap between the Middle and Index Fingers (Fig 3c).
- Insert the hand into the hilt of the sword so that the outside quillon is fitted into the gap created in step 3 and the grip of the sword rests in the Thenar Crease (Fig 3d)
- Place the tip of the thumb on the Inside quillon. Press the tips of the Middle, Ring, and Little Fingers into the grip of the sword, and curl the tip of the Index Finger under the base of the blade (Fig 3e).
The Primary Grip is used initially because it holds the sword in a straight line with the arm, allowing for quick changes of point orientation and a balanced application of force to either the inside or outside line. The trade off, is that the Primary Grip is doesn’t allow for as strong of an application of force as the Cutting Grip can apply in its strongest direction and it is not well suited to the kinds of large tip actions necessary for effective cutting.
Thibault, recognizing this limitation, gives the following instruction:
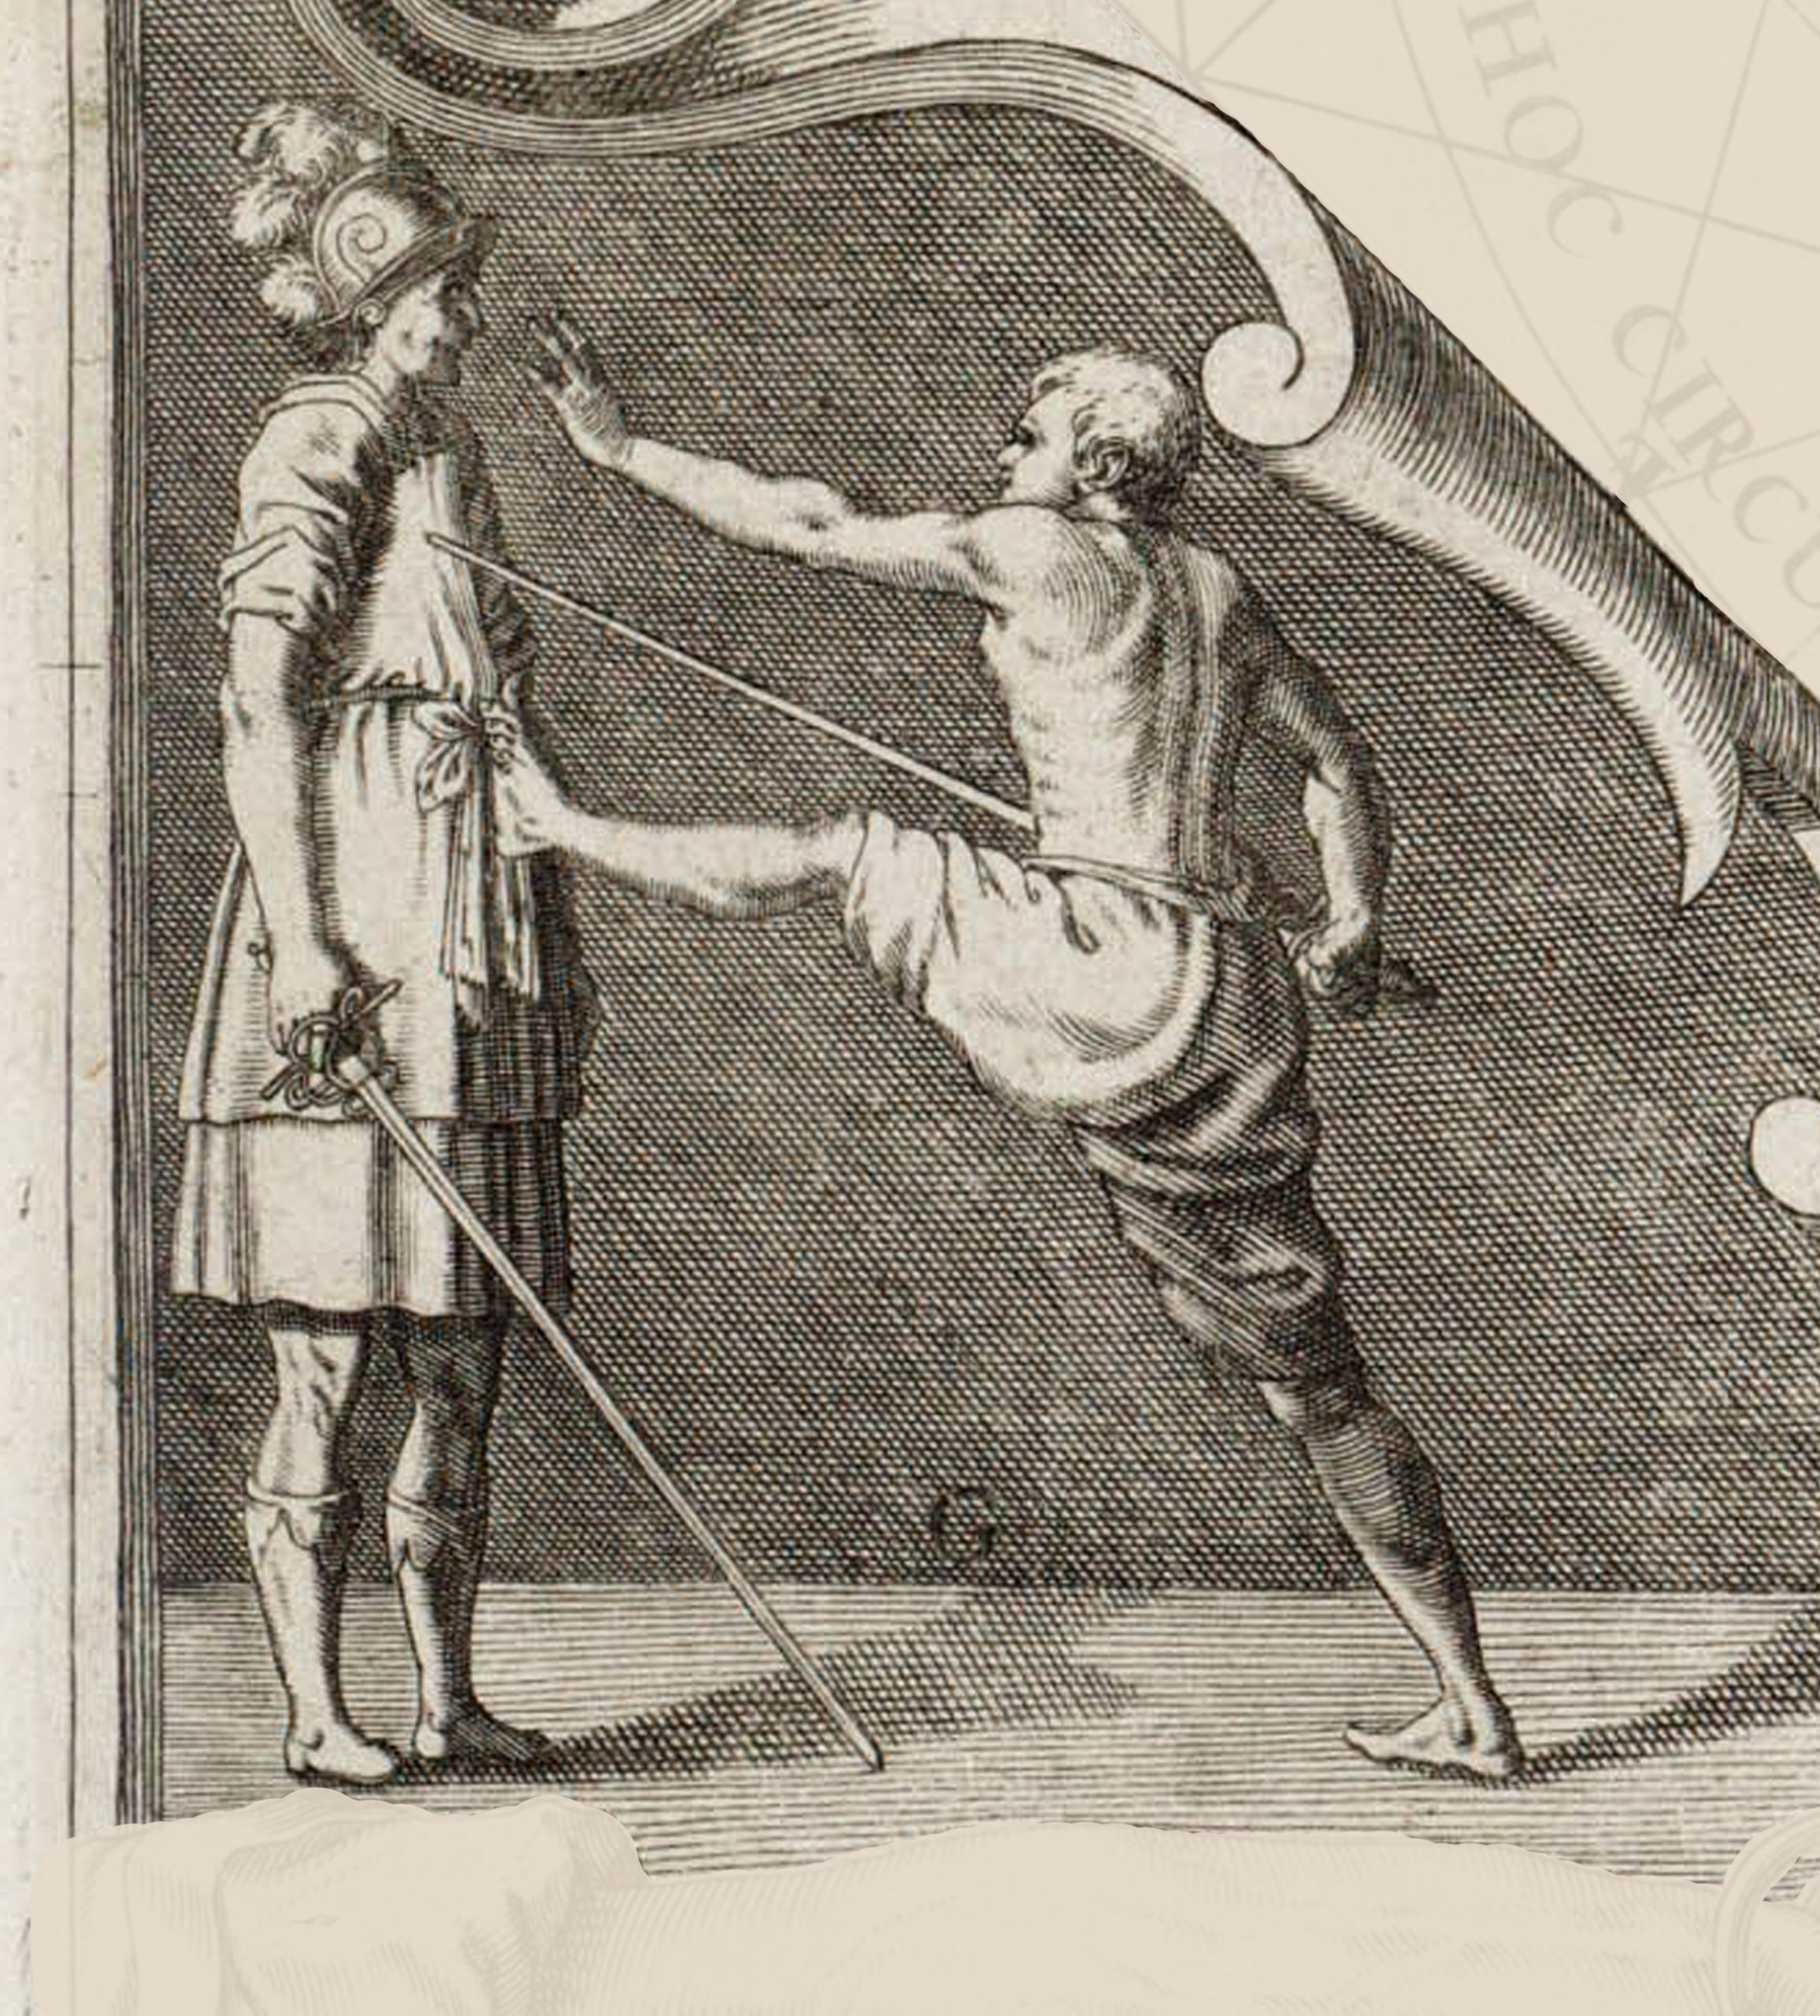
Similarly it must be noted, in all situations where cuts are at issue, whether estramasons or reverses, for those that grip the sword in our manner, that when one raises it up, in order to turn it around above the head, it is necessary to allow the thumb, which rests above the inside quillon, to slip underneath it, so that the outside quillon is vertical and the blade falls with the cutting edge first. Thereby the aforementioned estramasons and reverses will be rendered more easy to execute.
In addition to this advice, I have found through a mix of practice and study that the cutting grip is best used in most cases where the blade of the sword needs to be held at right angles to the forearm or when greater force needs to be brought to bear.
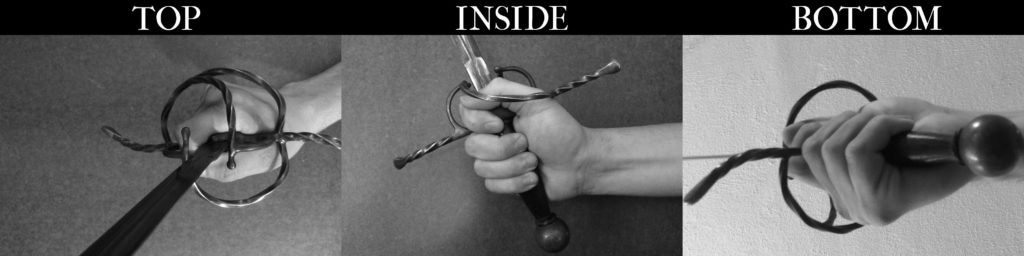
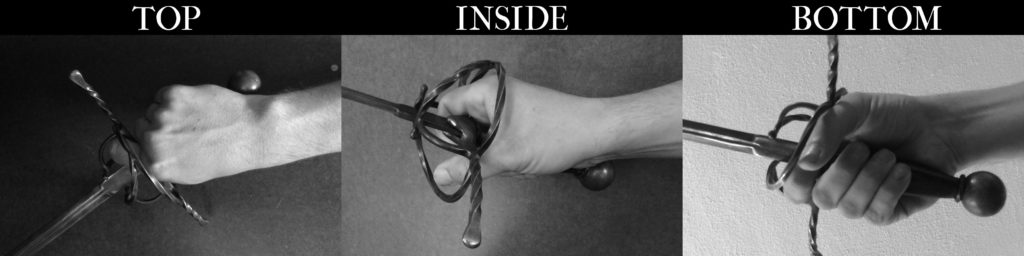
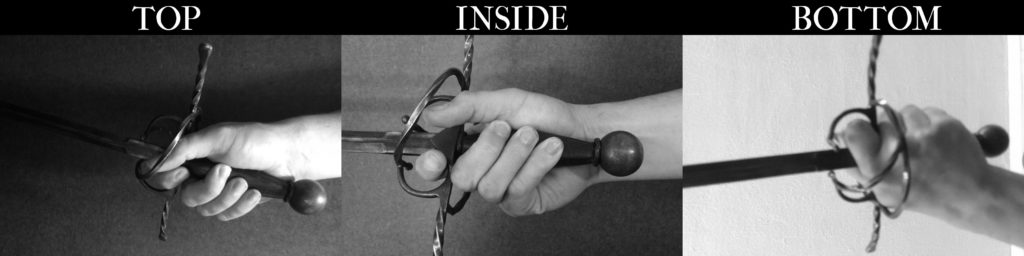
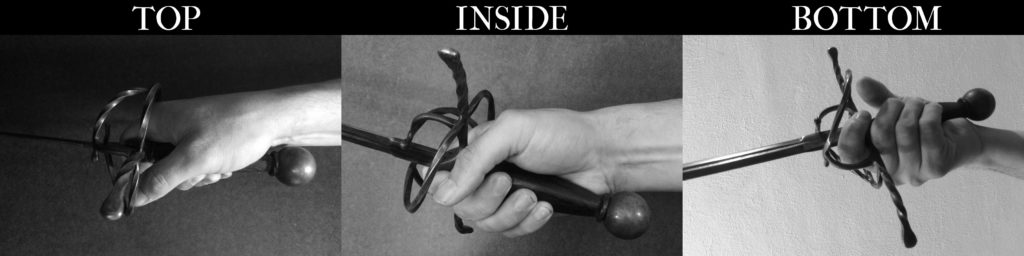
To assume the Cutting Grip, take the following steps:
- Hold the sword hand in a vertical alignment. With the Thumb side of the hand directed upward and the Little Finger side directed downward (Fig 5a).
- Extend the thumb horizontally away from the palm (Fig 5b).
- Holding the Middle, Ring, and Little fingers together, raise the Index Finger vertically, creating a gap between the Middle and Index Fingers (Fig 5c).
- Insert the hand into the hilt of the sword so that the outside quillon is fitted into the gap created in step 3 and the grip of the sword rests in the Palmer Crease (Fig 5d).
- Place the tip of the thumb below and around the Inside quillon. Press the tips of the Middle, Ring, and Little Fingers into the grip of the sword, and curl the tip of the Index Finger under the base of the blade. Let the Thumb come to rest along the side of the index finger (Fig 5e).
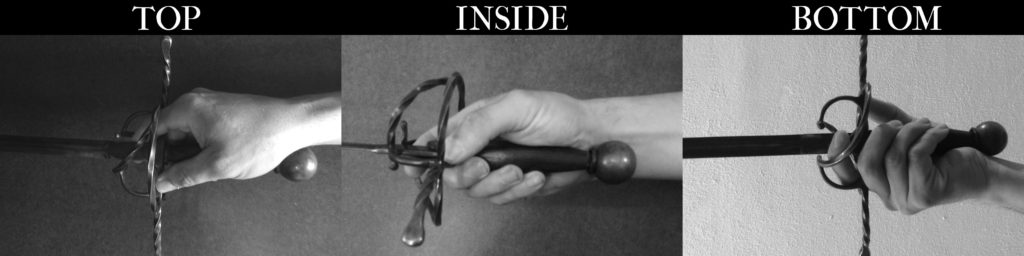
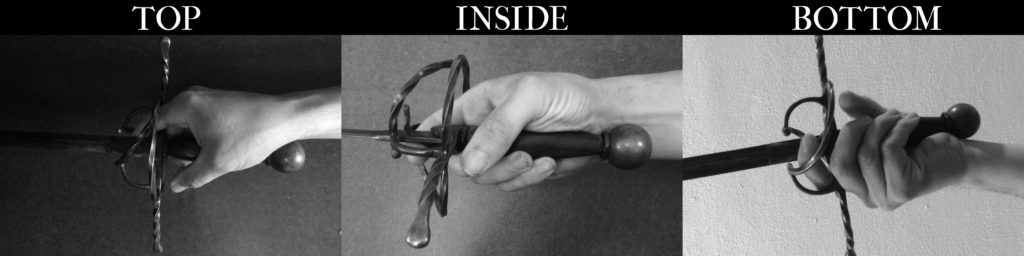
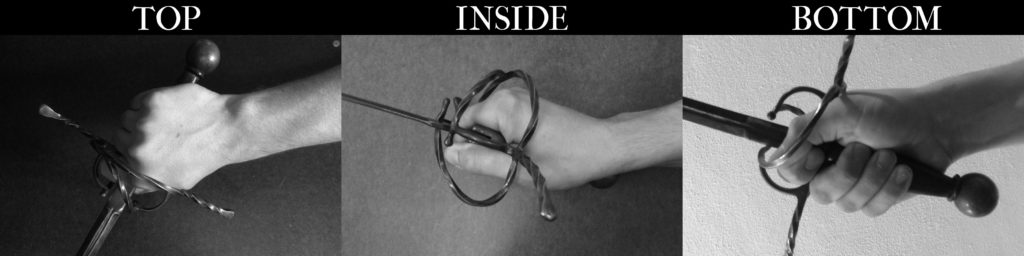
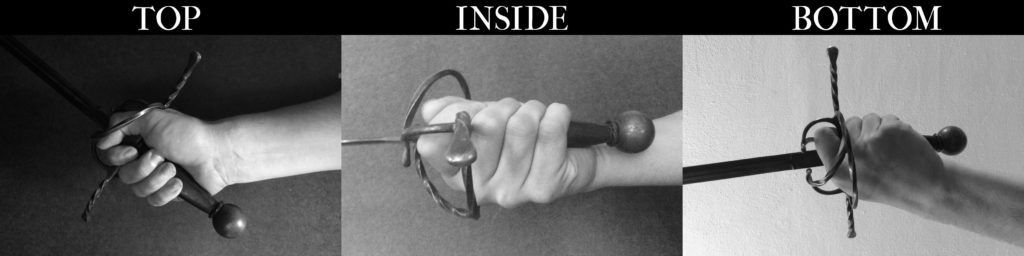
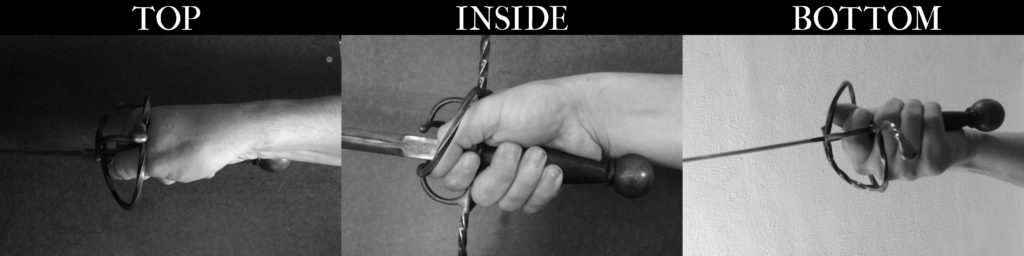
To assume the intermediate grip, follow the steps for assuming the cutting grip above and simply leave the handle resting along the thenar crease.
Grip Changes:
Being able to execute grip changes quickly and efficiently essential to executing many of Thibault’s techniques, especially those that involve cutting, effectively. As such, I recommend the practice of three different grip change exercises. It is worth noting that Thibault does not describe these types of grip changes and, quite probably, wouldn’t have categorized grip changes in this manner (if he chose to categorize them at all). Rather, these exercises are designed to reinforce the types of movements necessary to be able to change grips in any way that is needed. Each will be described in its turn.
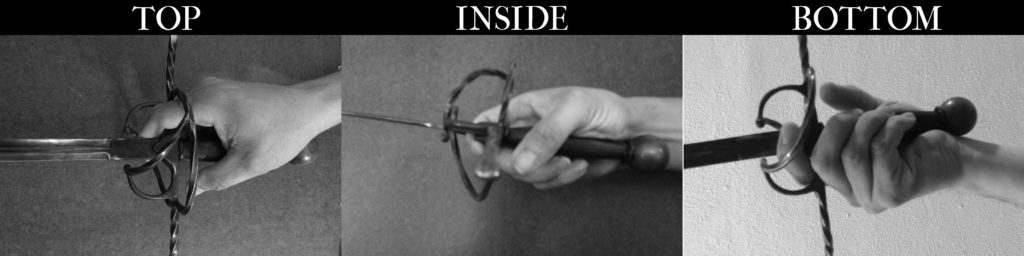
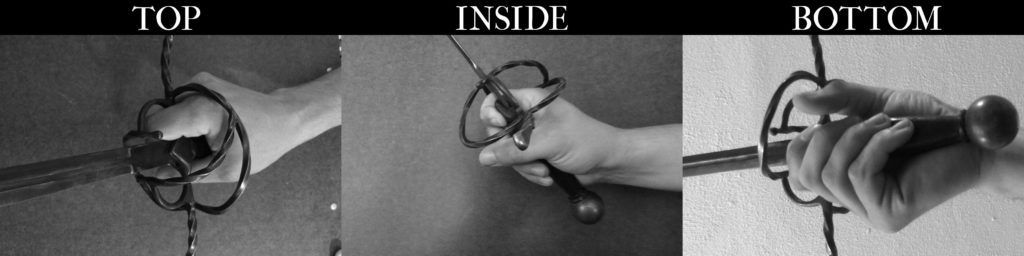
It should be noted that while Thibault makes use of an intermediate grip where the thumb and forefinger are in the position for the cutting grip but the handle of the sword still rests along the thenar crease. Moving in and out of that grip is not addressed in the exercises below because, by practicing the exercises below, I have found that the necessary strength and coordination are gained without adding redundant variants. For examples of this grip being used, as well as of the cutting grip as described above, see the appendix below. If you find that you need more practice specifically with the intermediate grip, I recommend modifying the Third grip change exercise to move between the primary grip and the intermediate grip.
First Grip Change Exercise:
The first exercise combines both axial and vertical rotation. In other words, the guard rotates ¼ turn around the long axis of the blade and ¼ turn vertically around the forward part of the grip so that the point raises. The steps are as follows:
- Begin in the Primary Grip (Fig. 6).

- Relax the Thumb and let it slip below the inside quillon (Fig. 7).
- Pull up and back with the Index Finger to begin raising the point of the sword (Fig. 8).
- As step 3 is completing, curl the Middle Finger, applying pressure with the fingertip to rotate the grip so that the inside quillon is turned upward. If you are right handed, this will be a clockwise turn; if you are left handed it will be counter-clockwise (Fig 9).
- Finish in the Cutting Grip (Fig 10).
- Reverse the above exercises to return to the Primary Grip.
Second Grip Change Exercise:
The second exercise combines a rotation of the hand at the wrist with a horizontal rotation of the point.
- Begin in the Primary Grip (Fig 11).
- Relax the Thumb and let it slip below the inside quillon (Fig 12).
- Rotate the hand from a palm in orientation to a palm down orientation (Fig 13).
- During step 3, curl the Middle and Ring fingers, applying pressure with the fingertips to rotate the grip so that the quillons remain (or return to) a horizontal alignment allowing the grip of the sword to move from the Thenar Crease to the Palmer Crease (Fig 14).
- Finish in the Cutting Grip (Fig 15).
- Reverse the above exercises to return to the Primary Grip.
Alternate Exercise:
The first alternate of the Second grip change exercises finishes in the Cutting Grip with the palm directed upward instead of downward.
- Begin in the Primary Grip (Fig 16).
- Relax the Thumb and let it slip below the inside quillon (Fig 17).
- Rotate the hand from a palm in orientation to a palm up orientation (Fig 18).

- During step 3, curl the Middle and Ring fingers, applying pressure with the fingertips to rotate the grip so that the quillons, rotating in the same direction as the hand, return to a horizontal alignment while allowing the grip of the sword to move from the Thenar Crease to the Palmer Crease (Fig 19).
- Finish in the Cutting Grip (Fig 20).
- Reverse the above exercises to return to the Primary Grip.
Alternate Exercise 2:
Once you are comfortable with both the standard and inverted forms of the Second exercise, start moving the point of rotation to specific points on the blade, displacing the hand and point to varying degrees to hold the chosen point fixed in space while the hand and weapon move through the grip changes.
Third Grip Change Exercise:
The Third exercise involves an axial rotation of the blade without any other noticeable displacement of the sword.
- Begin in the Primary Grip (Fig 21).
- Relax the Thumb and let it slip below the inside quillon (Fig 22).
- Curl the Middle finger, applying pressure with the fingertip to rotate the grip so that the quillons, rotating from a horizontal alignment to a vertical alignment. If you are right handed, this will be a clockwise rotation; if you are left-handed it will be counter-clockwise. At the same time, allow the wrist to rotate slightly so that, while the palm remains pointing inward, the fingers are directed slightly downward and the sword moves from the Thenar Crease to the Palmer Crease (Fig 23).
- Finish in the Cutting Grip (Fig 24).
- Reverse the above exercises to return to the Primary Grip.
Notes on Executing the Grip Changes:
Initially, the grip changes will likely feel very clumsy, weak, and uncoordinated. This is completely natural and should pass with time and practice. It will be tempting to perform the grip changes by quick movements from either the shoulder or the elbow, making use of the inertia of the weapon to “snap” the sword into position quickly. This should be avoided as it results in bad practice that is not effective when you need to perform a grip change against resistance. Moreover, it doesn’t develop the musculature and habits of movement that these exercises are intended to build. Instead, a portion of your exercise should always include the execution of grip changes as slowly as possible, using only the movements described above.
Another bad habit that new fencers are prone to is focusing exclusively on the movement of the exercises without giving proper attention to the starting and ending positions. As a result, they end up near the Primary Grip and close to the Cutting Grip, but only intermediately achieve either. I would argue that, since the purpose of a grip change is to transition between the two grips, if you fail to achieve those positions consistently you are, by definition, not completing the action correctly. Given that, form an early habit of making sure that you are beginning and ending each repetition of each exercise in the correct grip.
If arm strength is an issue, the grip changes do not necessarily need to be performed in the guard of the right angle. As an alternate position, hold your arm so that your elbow is against your flank and your forearm is parallel to the floor. This will decrease strain to your shoulder without introducing odd wrist angles to the exercise. As arm strength increases and the movements begin to be more familiar, practice the grip changes with the arm fully extended, the arm fully bent, and in varying positions in between. It is also advisable to practice with the arm extended in the Profile, Half-Profile, and Square Planes.
If grip strength is an issue, find a support of a convenient height and place the tip of your sword on the support. You should be able to perform the Second and Third grip change exercises without removing the point from the support. The First grip change exercise will move on and off the support. If you need to work this way, you should attempt to perform an increasing number of each grip change exercise without the support each time you practice.
Whether or not you intend to fence with your non-dominant hand, it is recommended that you practice your grip changes both Left and Right-handed. Aside from helping to build coordination, these exercises will strengthen and condition your arms and it is generally considered best for conditioning to be even across both sides of the body. Additionally, when learning new actions, it can be useful to practice them with muscles that are less likely to be used to performing similar actions. I have often had students remark that, while they are normally Right-handed, they were able to learn certain actions more with their easily left hand because their body was less likely to substitute a more familiar action in its place.
Finally, a quick note on how much to practice. Grip changes cannot, within certain limits of reasonableness, be over-practiced. I make it a habit to execute between 30 and 50 complete repetitions of each grip change exercise with each hand at the beginning of each training session. One repetition consists of changing from the Primary Grip to the Cutting Grip and back to the Primary Grip. For the Second grip change exercise, the standard and inverted forms can be alternated so that they combine to between 30 and 50 repetitions. If you find that you are reaching a state of fatigue that prevents you from executing the action correctly, take a short break, stretch out your fingers, wrist and arm and then resume.
Appendix:
Explicit references to Grip Changes in Thibault’s Academie de l’Espee (Translation by John Michael Greer)
Tabula VI, Circle 6, Paragraph 1:
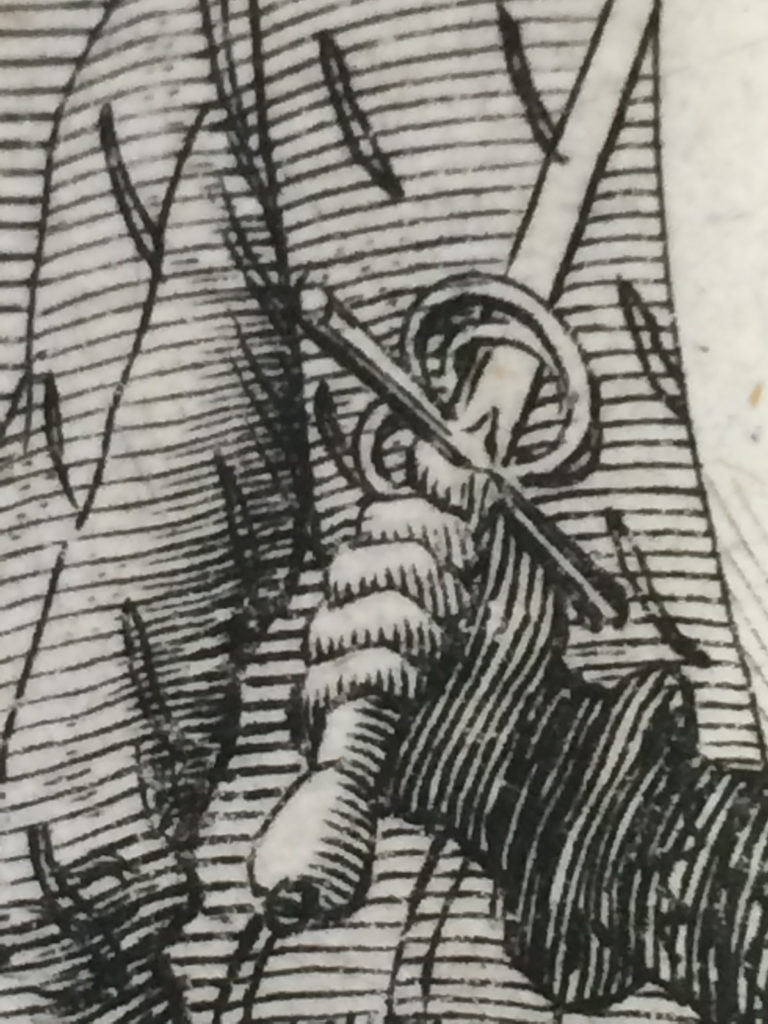
Alexander continues the operation, continuing to turn his right side forward together with his sword arm, which he frees at the same time from beneath the opposing sword with a movement of his wrist, allowing the thumb, which is braced against the inside quillon, to slide under it.
Tabula XIII, Circle 1, Paragraph 1:
Finishing, he lets his thumb slip from where it was braced, on top of the inside quillon, to underneath, in such a way that the quillon ends up pointing upwards.
Tabula XVII, Circle 7, Paragraph 3:
Similarly it must be noted, in all situations where cuts are at issue, whether estramasons or reverses, for those that grip the sword in our manner, that when one raises it up, in order to turn it around above the head, it is necessary to allow the thumb, which rests above the inside quillon, to slip underneath it, so that the outside quillon is vertical and the blade falls with the cutting edge first. Thereby the aforementioned estramasons and reverses will be rendered more easy to execute.
Tabula XIX, Circle 7, Paragraph 1:

Meanwhile, letting his thumb slide under the inside quillon, he makes a cut down from above to the thick part of Zachary’s right leg, as shown in the figure.
Tabula XXI, Circle 14, Paragraph 1:
Alexander responds accordingly by abandoning Zachary’s blade at this same moment, cutting down from above with his own blade, slipping his thumb under the inside quillon, and stepping with his right foot sideways, to the near side and outside of the circle, in the same time delivering an attack to the back of the right leg, as seen in the figure.
Tabula XXII, Circle 5, Paragraph 1:
But while Zachary raises his arm and hilt in order to cover his face, Alexander changes his operation, letting his point fall, and sliding his thumb past the inside quillon of his hilt where it was to begin with, so that it rises up.
Tabula XXII, Circle 13, Paragraph 1:
Alexander abandons his adversary’s blade, raising his right foot, bringing his own sword with a movement of his wrist from below his opponent’s to above it (while letting his thumb slide off the inside quillon) and thus freeing it in the same time, so that Zachary’s sword leaps away.
Tabula XXIII, Circle 1, Paragraph 1:
Extending his arm moderately, he throws his sword under that of his adversary at the First Instance, letting his thumb slip to the other side of the inside quillon, on which it is placed, in such a way that the outside quillon turns down, and also making the two blades two parallel lines, taking proper care to put his foot down slowly on the ground, so as to be quick to work against Zachary’s blade, and to resist it.
Tabula XXVIII, Circle 8, Paragraph 1:
Abandoning his adversary’s blade, he lifts his own above it, letting his thumb slip under his inside quillon, and strikes his opponent with an extended arm in the right side of the head, while planting his upraised foot a large step outside the circle, leaning on it and by the same means making the left follow after, as appears in the figure.
Book 2 Tabula XI (Chapter 42 overall), Circle 9, Paragraph 1:

Alexander, in order to work against him, advances his sword (slipping his thumb so that the quillons are perpendicular to the horizon) along with his left foot. While planting the latter on the line EH, he covers the foible of his adversary’s blade with the forte of his own (as in Circle No. 1 of Chapter 13 of the first book) and very slowly lifts his right foot afterwards, taking heed of his adversary’s operations.
Sources:
- Thibault, G. (2006). Academy of the sword: Wherein is demonstrated by mathematical rules on the foundation of a mysterious circle the theory and practice of the true and heretofore unknown secrets of handling arms on foot and horseback (1628). Highland Village, Tex.: Chivalry Bookshelf.
- Thibault, G. (1630). Academie de l’Espee: de Girard Thibault d’Anvers ouse demonstrent Par Reiglas Mathematiques sur la fondement d’un Cercle Mysterieux La Theorie Et Pratique des vrais et iusqua’a present incognus secrets Du Maniement Des Armes A Pied et a Chevas (1628). Lieden: B. et A. Elzevier.
- Hand Surface Anatomy – Language of Hand and Arm Surgery Series. (n.d.). Retrieved August 27, 2015.